DIY Edible Arrangement for Less than $20

Mother's Day is fast approaching! If you're still looking for a perfect gift for mom while maintaining your budget, you came to the right place! Edible Arrangement's fruit bouquets are some of the most popular Mother's Day presents. These bouquets prices range from $60 to $150. Why not make mom your own DIY fruit arrangement? And for less than $20! These fruit bouquets are easy to make and takes very little time to prepare. Plus, a personalized handmade bouquet is always a better option! Overall, aside from the trip to the grocery store, this bouquet took me less than an hour to assemble.
Read on for the tutorial! Also, if you want to make Mother's Day even more special, why not try making French Macarons? Click here for your printable recipe! This white chocolate raspberry truffle is a crowd favorite!
DIY Edible Arrangement's Fruit Bouquet
Materials:
Vase or Pot (the Dollar Store has plenty of selection for your vase)
Flower Cookie Cutter (Daiso for $1.50)
Melon Baller (Daiso for $1.50)
Wooden Skewers
Long Nose Pliers (optional, to help push the skewers down)
Paper towels or kitchen towels
Sheet pan or tray to set all your fruits in
Scissors

Ingredients:
Feel free to play with the selection of fruits especially if there are specific fruits your mom enjoy more! There are also seasonal fruits like kiwi that will make an excellent addition to this. I like to have various colors and texture in my arrangement. Also, I prefer using cabbage as a base compared to crafting foams. Cabbage is green and makes an excellent background color for the fruits, plus its edible!
1 medium size Cabbage (used as a base where you stick all the fruits)
1 bunch of Kale (used to cover open spots once the bouquet is done)
1 Cantaloupe
1 large Pineapple
1 lb Grapes
1 box Strawberries
2 Green Apples
1 Orange
Preparation
Wash all fruits and dry to properly.
Place cabbage inside the vase. If too big, chop off a portion of the cabbage to make it fit. Make sure it is snug and sit inside perfectly. The cabbage holds the entire arrangement and you don't want a wobbly base. Place the chopped side down.

Line sheet pan or tray with paper towels or a kitchen towel.
Without taking the skin, slice pineapples sideways into half an inch thickness.
Using the cookie cutter, cut pineapples into flower shapes. I used 2 sizes of the cookie cutter.

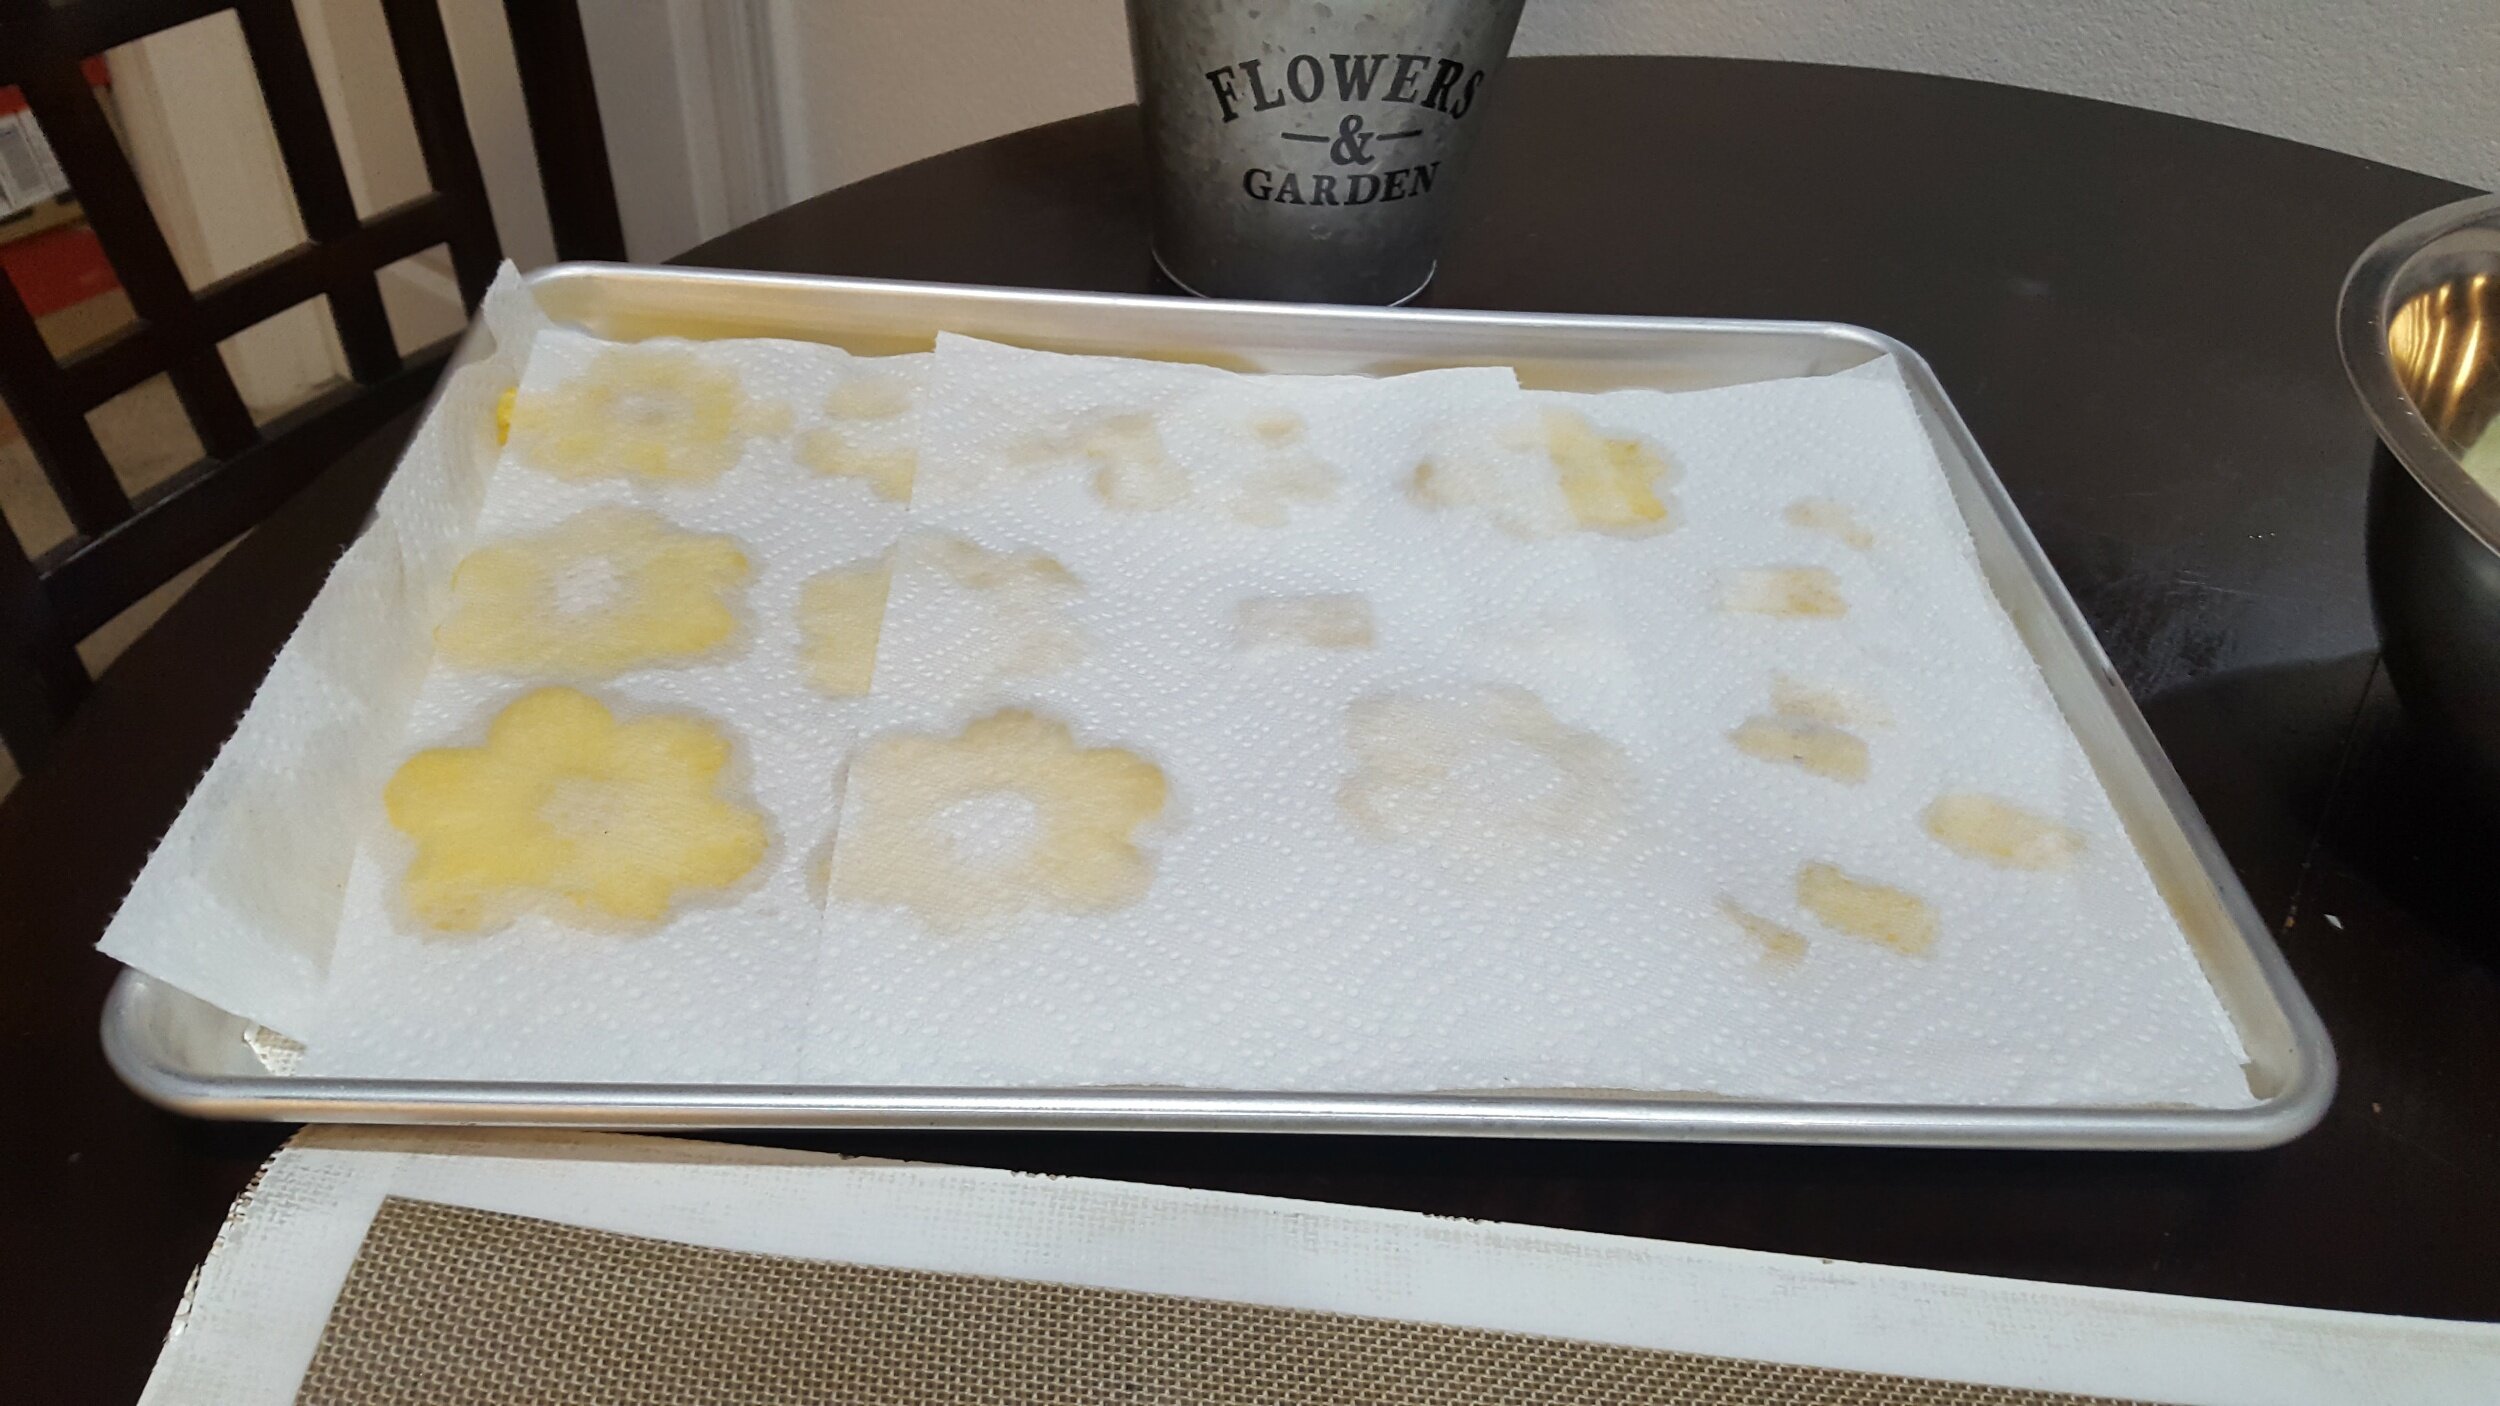
With a scissor, trim the sides of pineapples then set it in the lined sheet pan.
With the excess pineapples, cut rectangular shapes as shown above. Then pat pineapples dry with another towel.
Using a melon baller, deeply mold the melon with the baller and set aside.

Prepare all other fruits by slicing. DO NOT PLACE THEM IN THE SKEWERS YET. If you plan on including any green apples, slice it last and immediately place into a cold water with a splash of lemon to prevent it from browning.

The Arrangement
First, find the front side of the vase if it is not marked. The vase I used has markings making it simple for me to know the front side. Make sure that you are arranging with the front side as a priority.
Pro-tip: cut your skewers one at a time right before sticking it into the cabbage. Use a long-nose pliers for hard-to-reach areas!
Start by assembling your pineapple and cantaloupe flower one at a time. Then stick it into the cabbage. All other fruits will be used to fill the empty spaces.
Cut a skewer to your desired height. I prefer the fruits closer to the cabbage. You want your fruits at different heights to create a fuller look.
To assemble the flower, skewer the rectangular pineapple first. This helps support the flower.

Then skewer the flower pineapple slightly angled leaving a little skewer tip for the cantaloupe in the center. Then place the cantaloupe ball.

Stick the first set of the flower to your cabbage base. Repeat the process until all flowers are arranged. The empty spots will be filled with other fruits after.

Once all pineapple flowers are arranged, add the rest of the fruits into the vase.

You will find yourself adjusting the arrangement a few times. Fill as much of the empty spots as you can.
Once done, use the bunch of kale to cover up other smaller empty spots and the base of the vase.

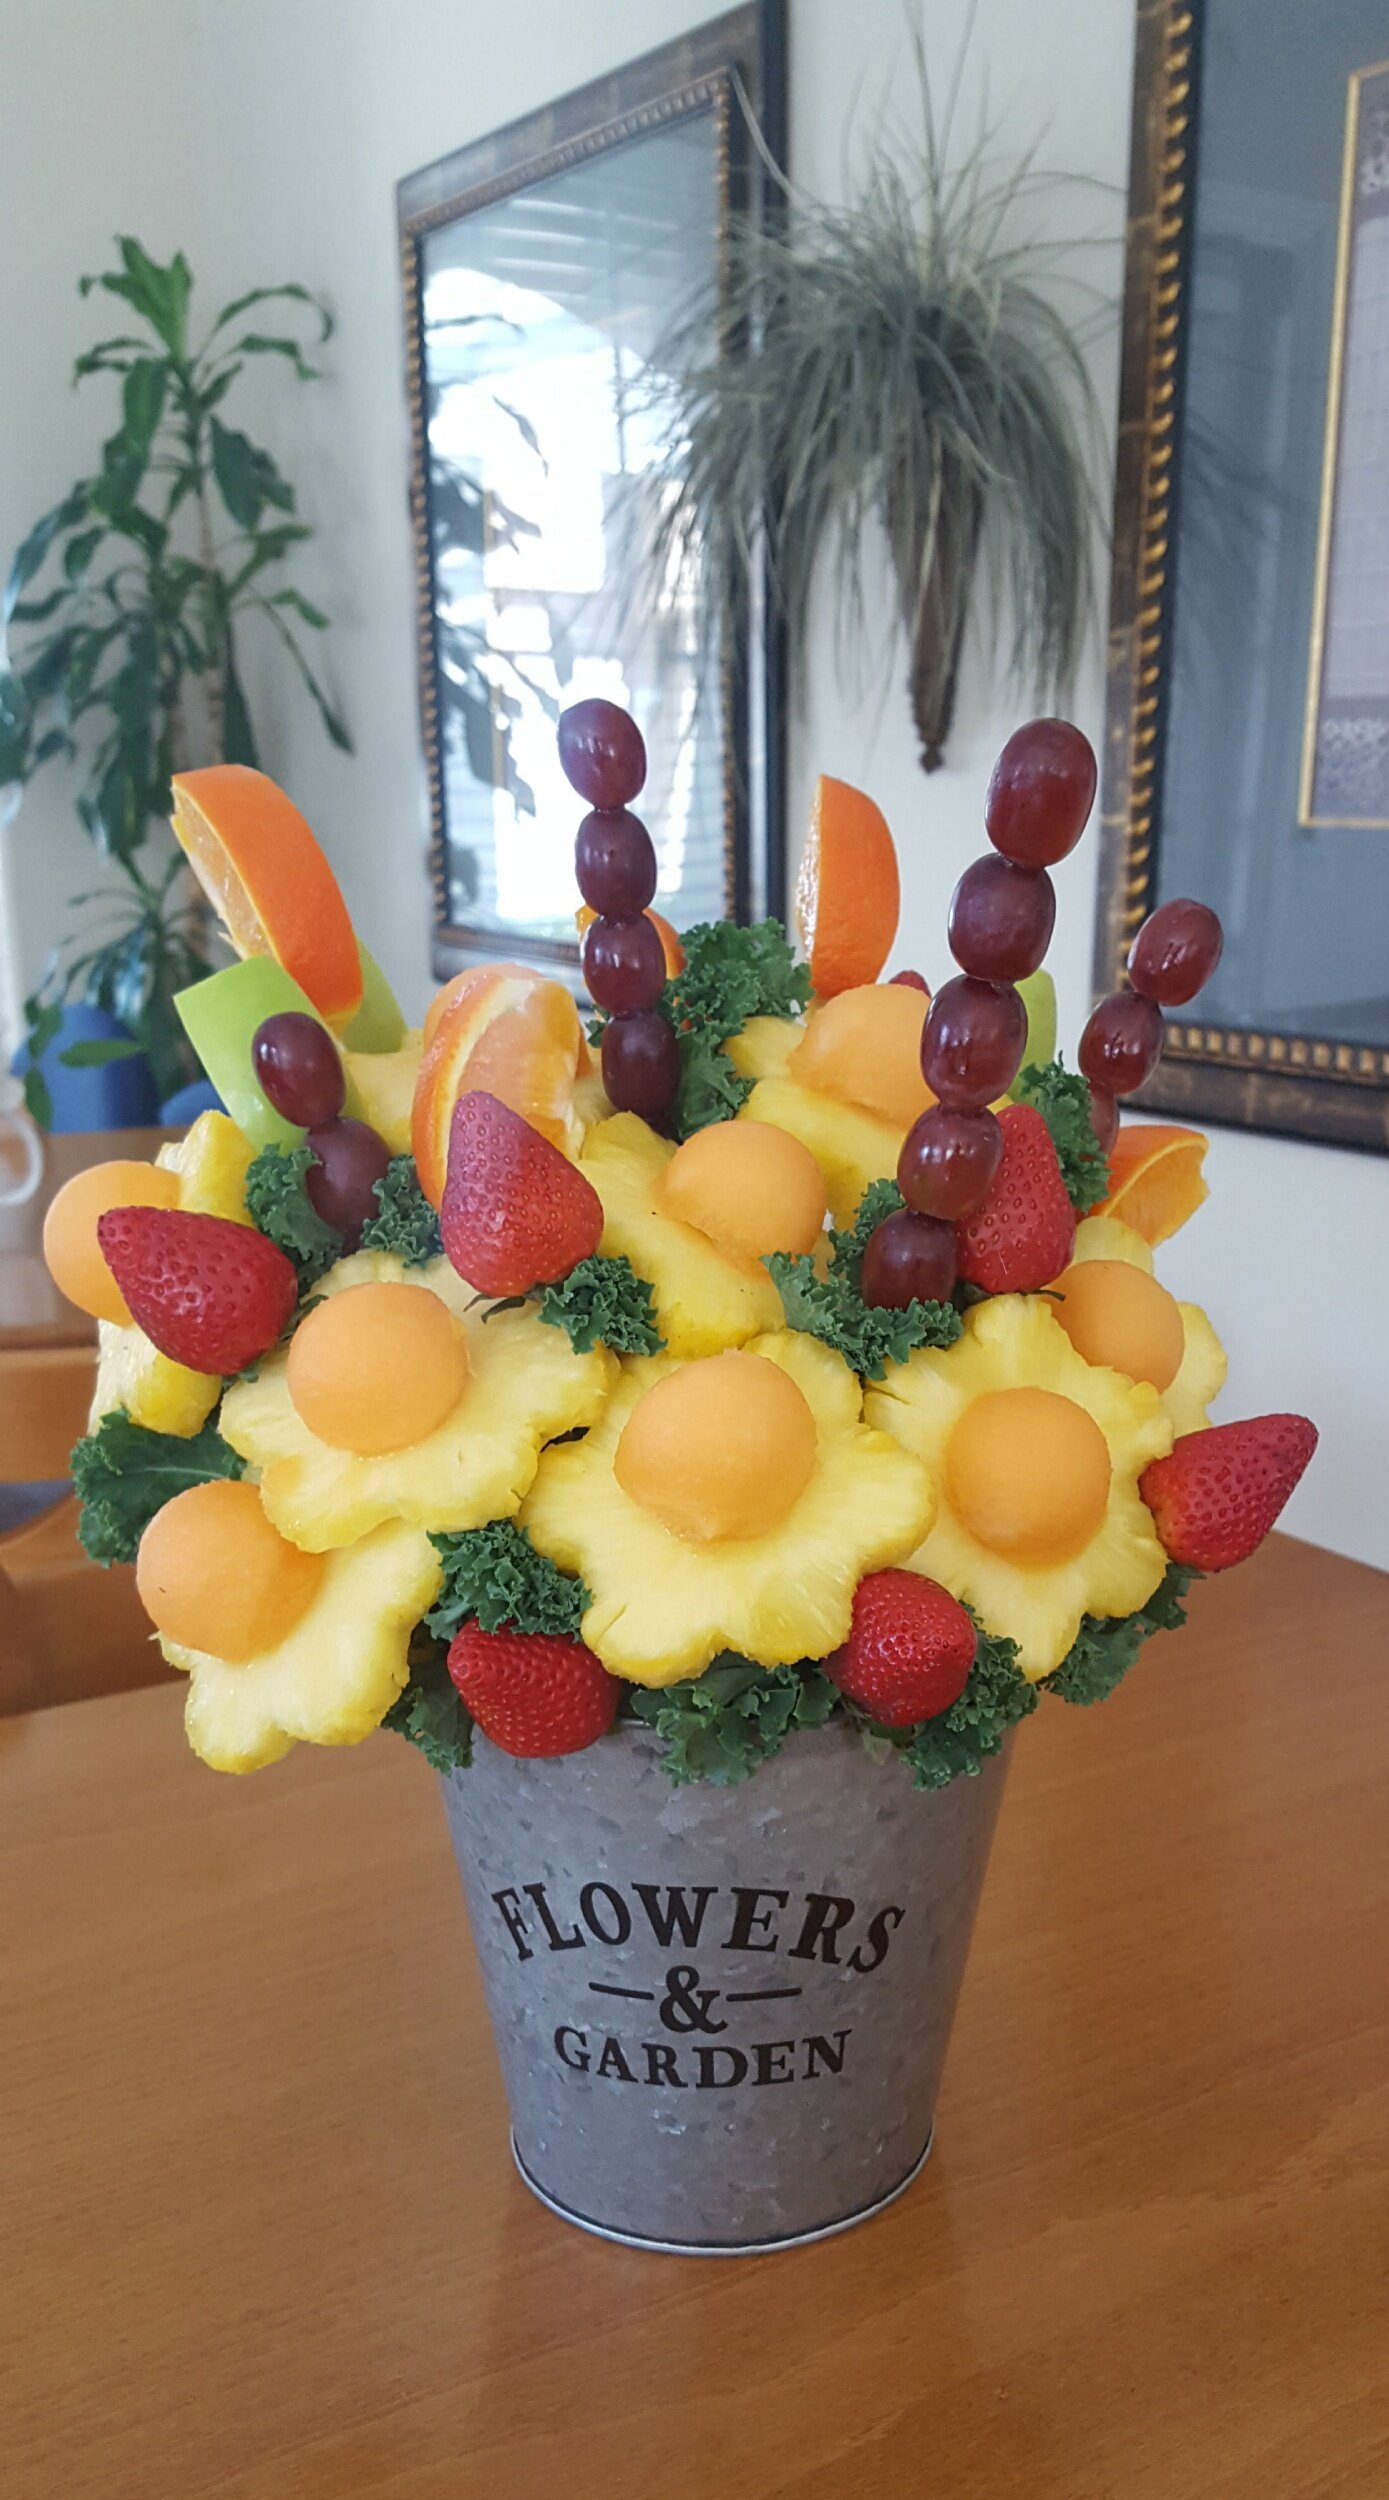
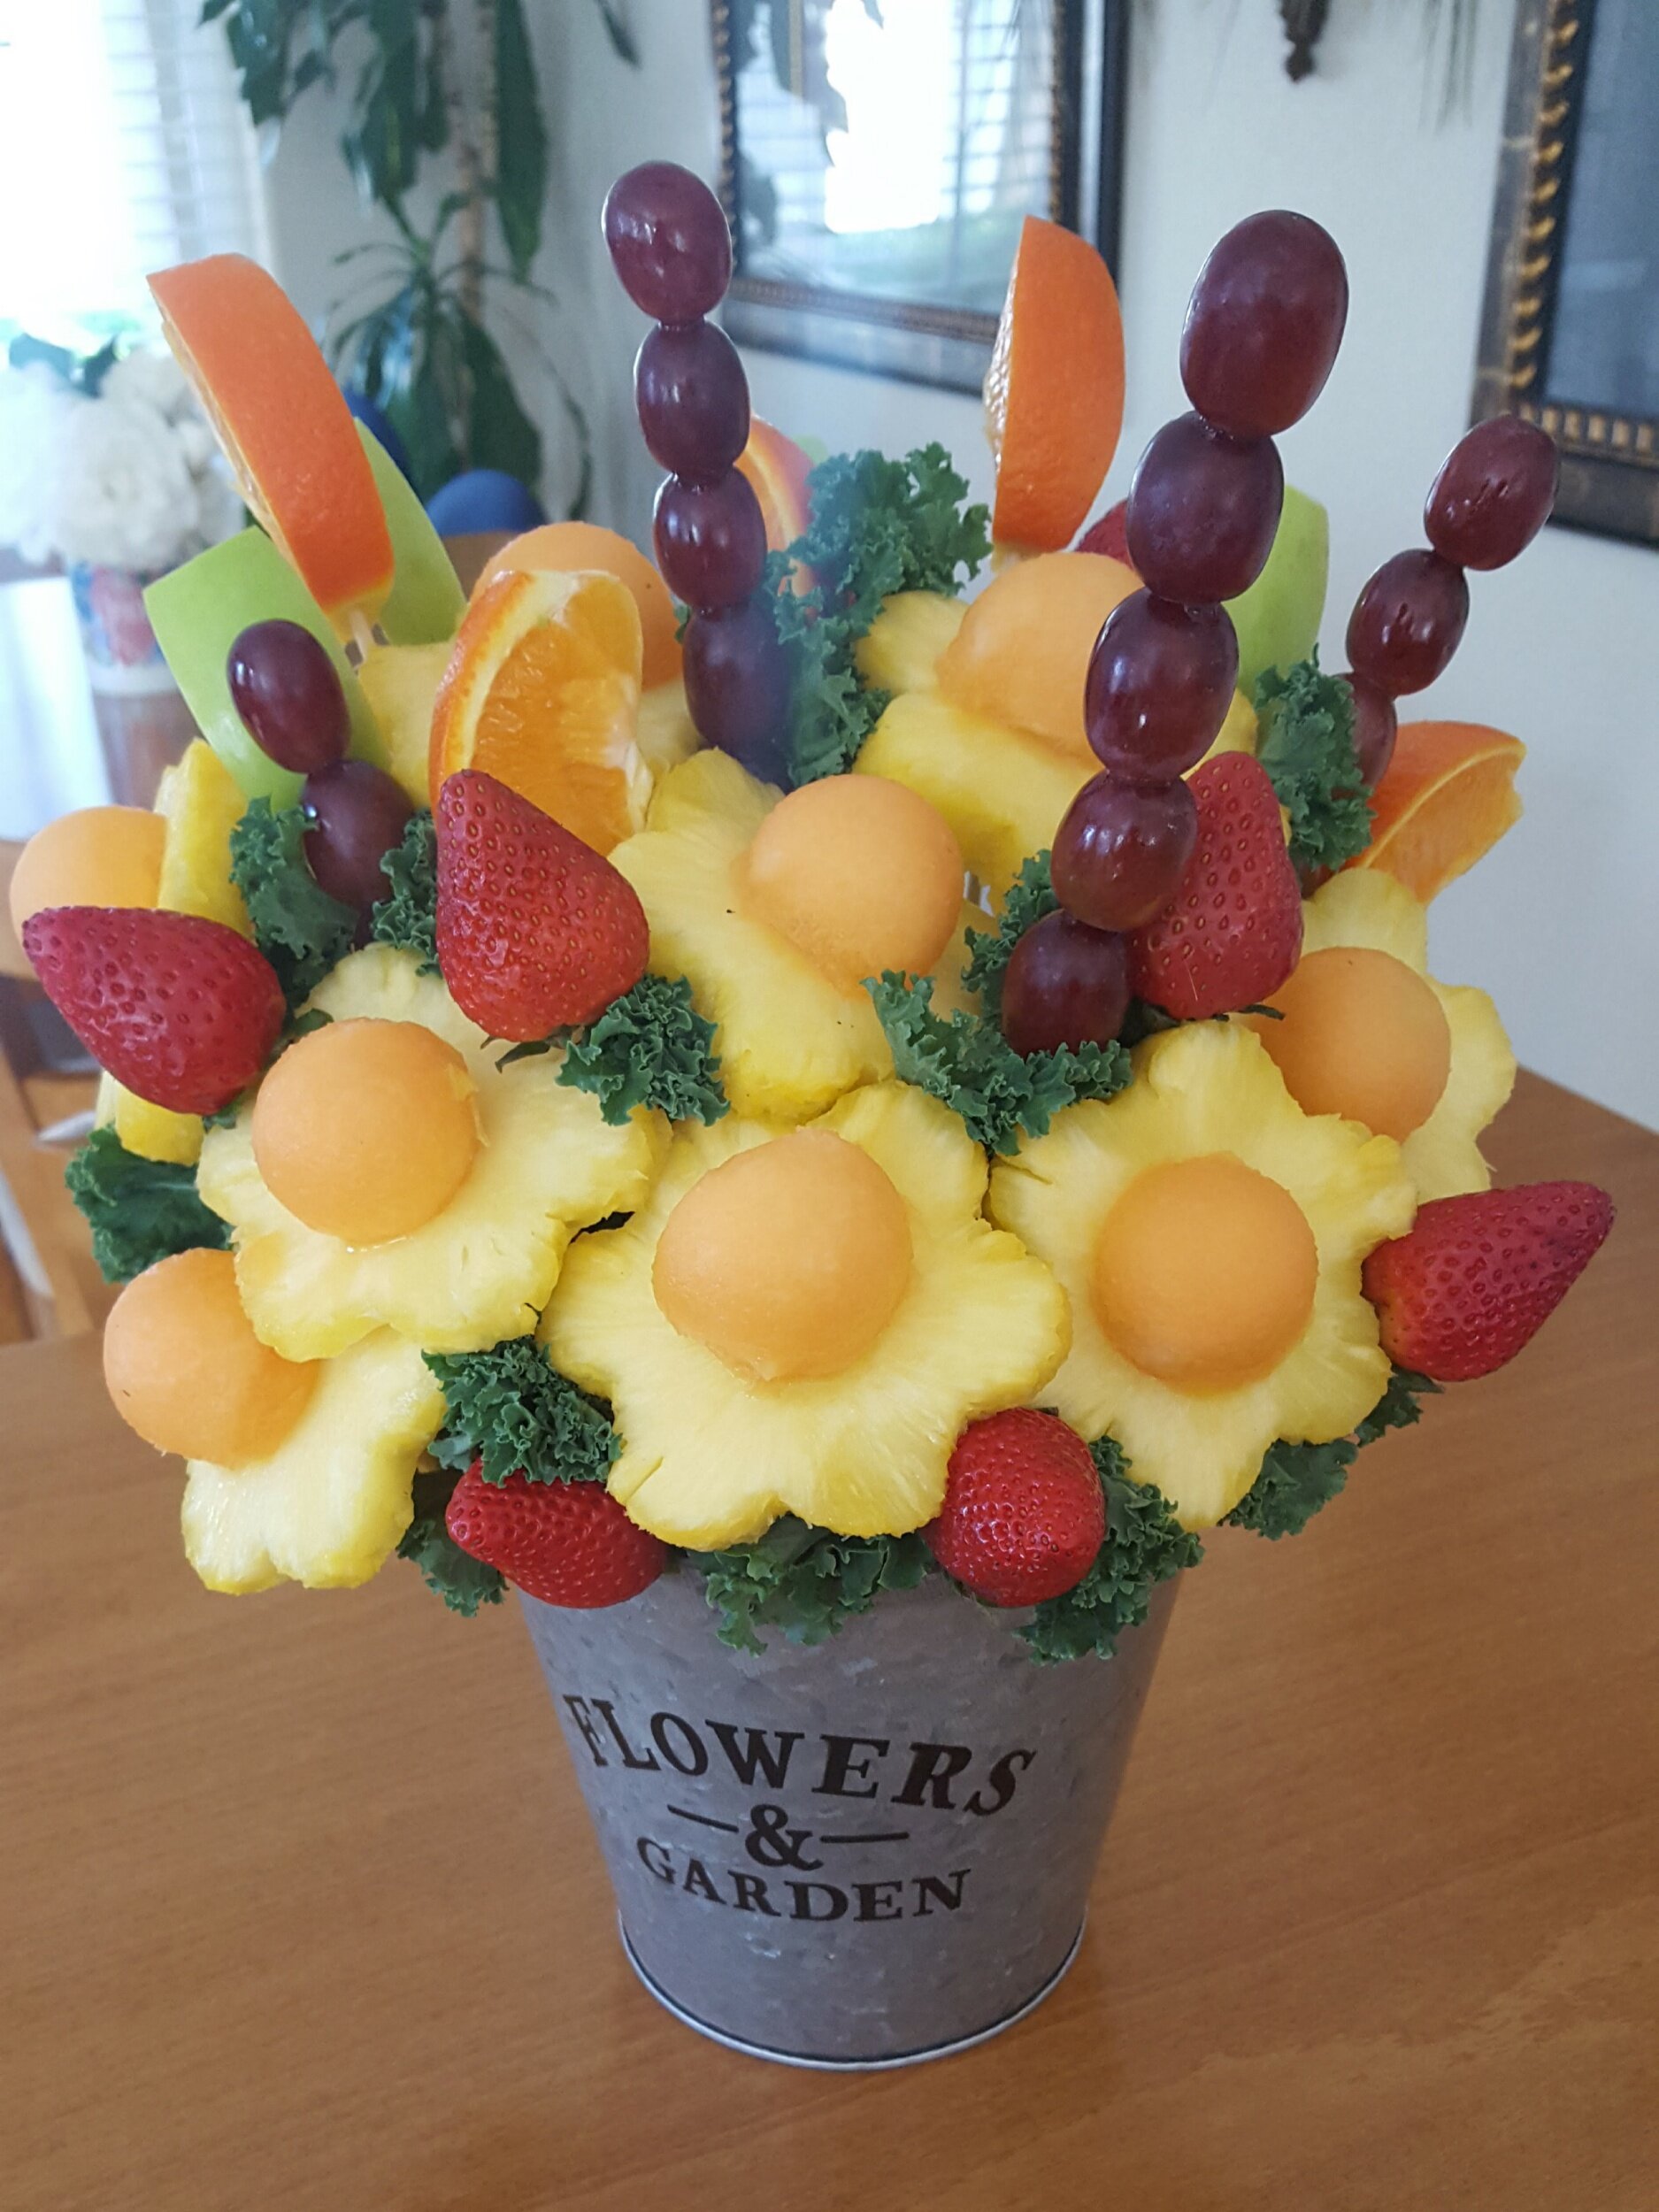
Voila! Here's your $20.00 Edible Arrangement Fruit Bouquet!


This DIY fruit bouquet is comparable to Edible Arrangement's Large Fruit Bouquet for $109!

Edible A
Pro-tip: Refrigerate immediately! These bouquets only have up to 48 hours shelf life! I suggest assembling these hours before giving it away or make it a day ahead but kept in the fridge covered with a plastic cover.
Budget

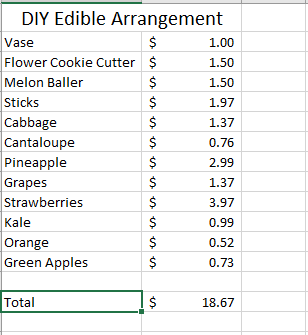
Here is my costing chart! This bouquet cost me less than $20 and there is enough leftover fruit for me to make over a dozen of chocolate dipped strawberries!
Hope this helped you create your very own fruit bouquet! Cheers from me and my little helper, Mayhem!Let's get social and tag me with your creations @sweetsavorygrace on Instagram!