Gourmet Milk Chocolate Bar Recipe
This blog post contains affiliate links that earn me a small commission if my readers decided to purchase the products listed.

Yes, homemade chocolate bars are simple to make with the right technique and equipment. First, you need to learn the art of tempering chocolate. Once mastered, the variety of confections you can make are endless. From chocolate-coated fruits and nuts to homemade chocolate bars.
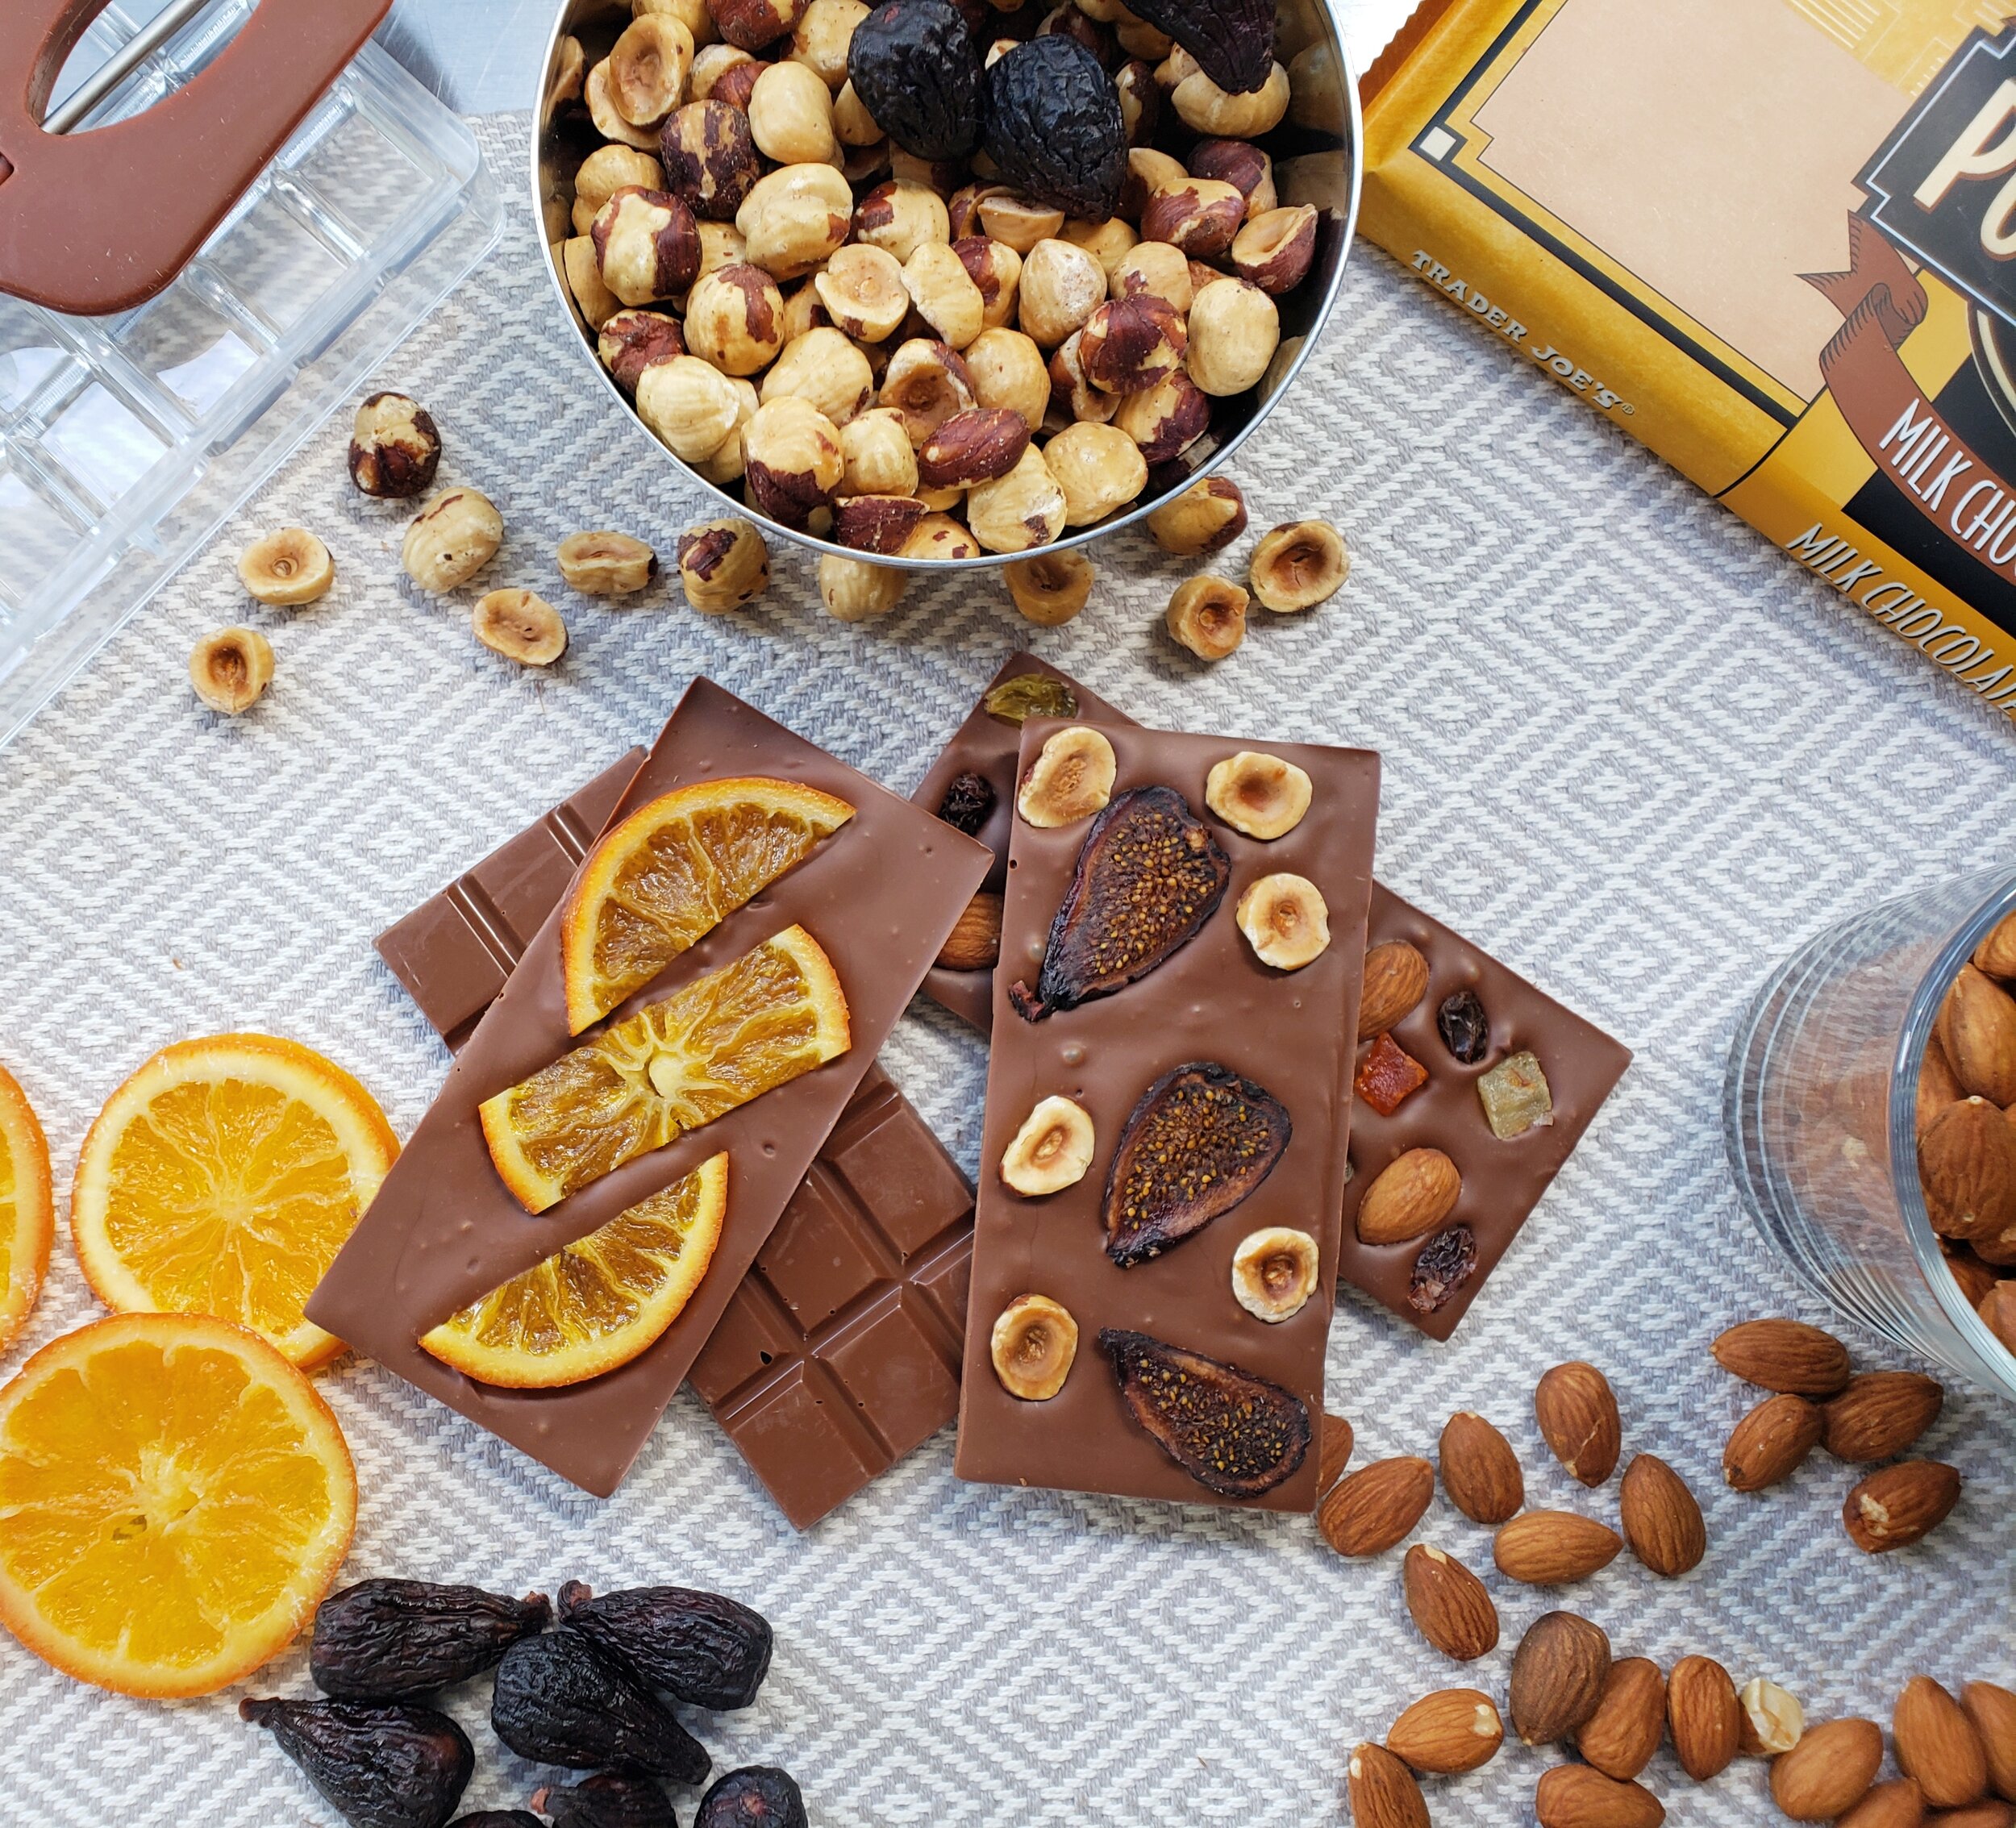
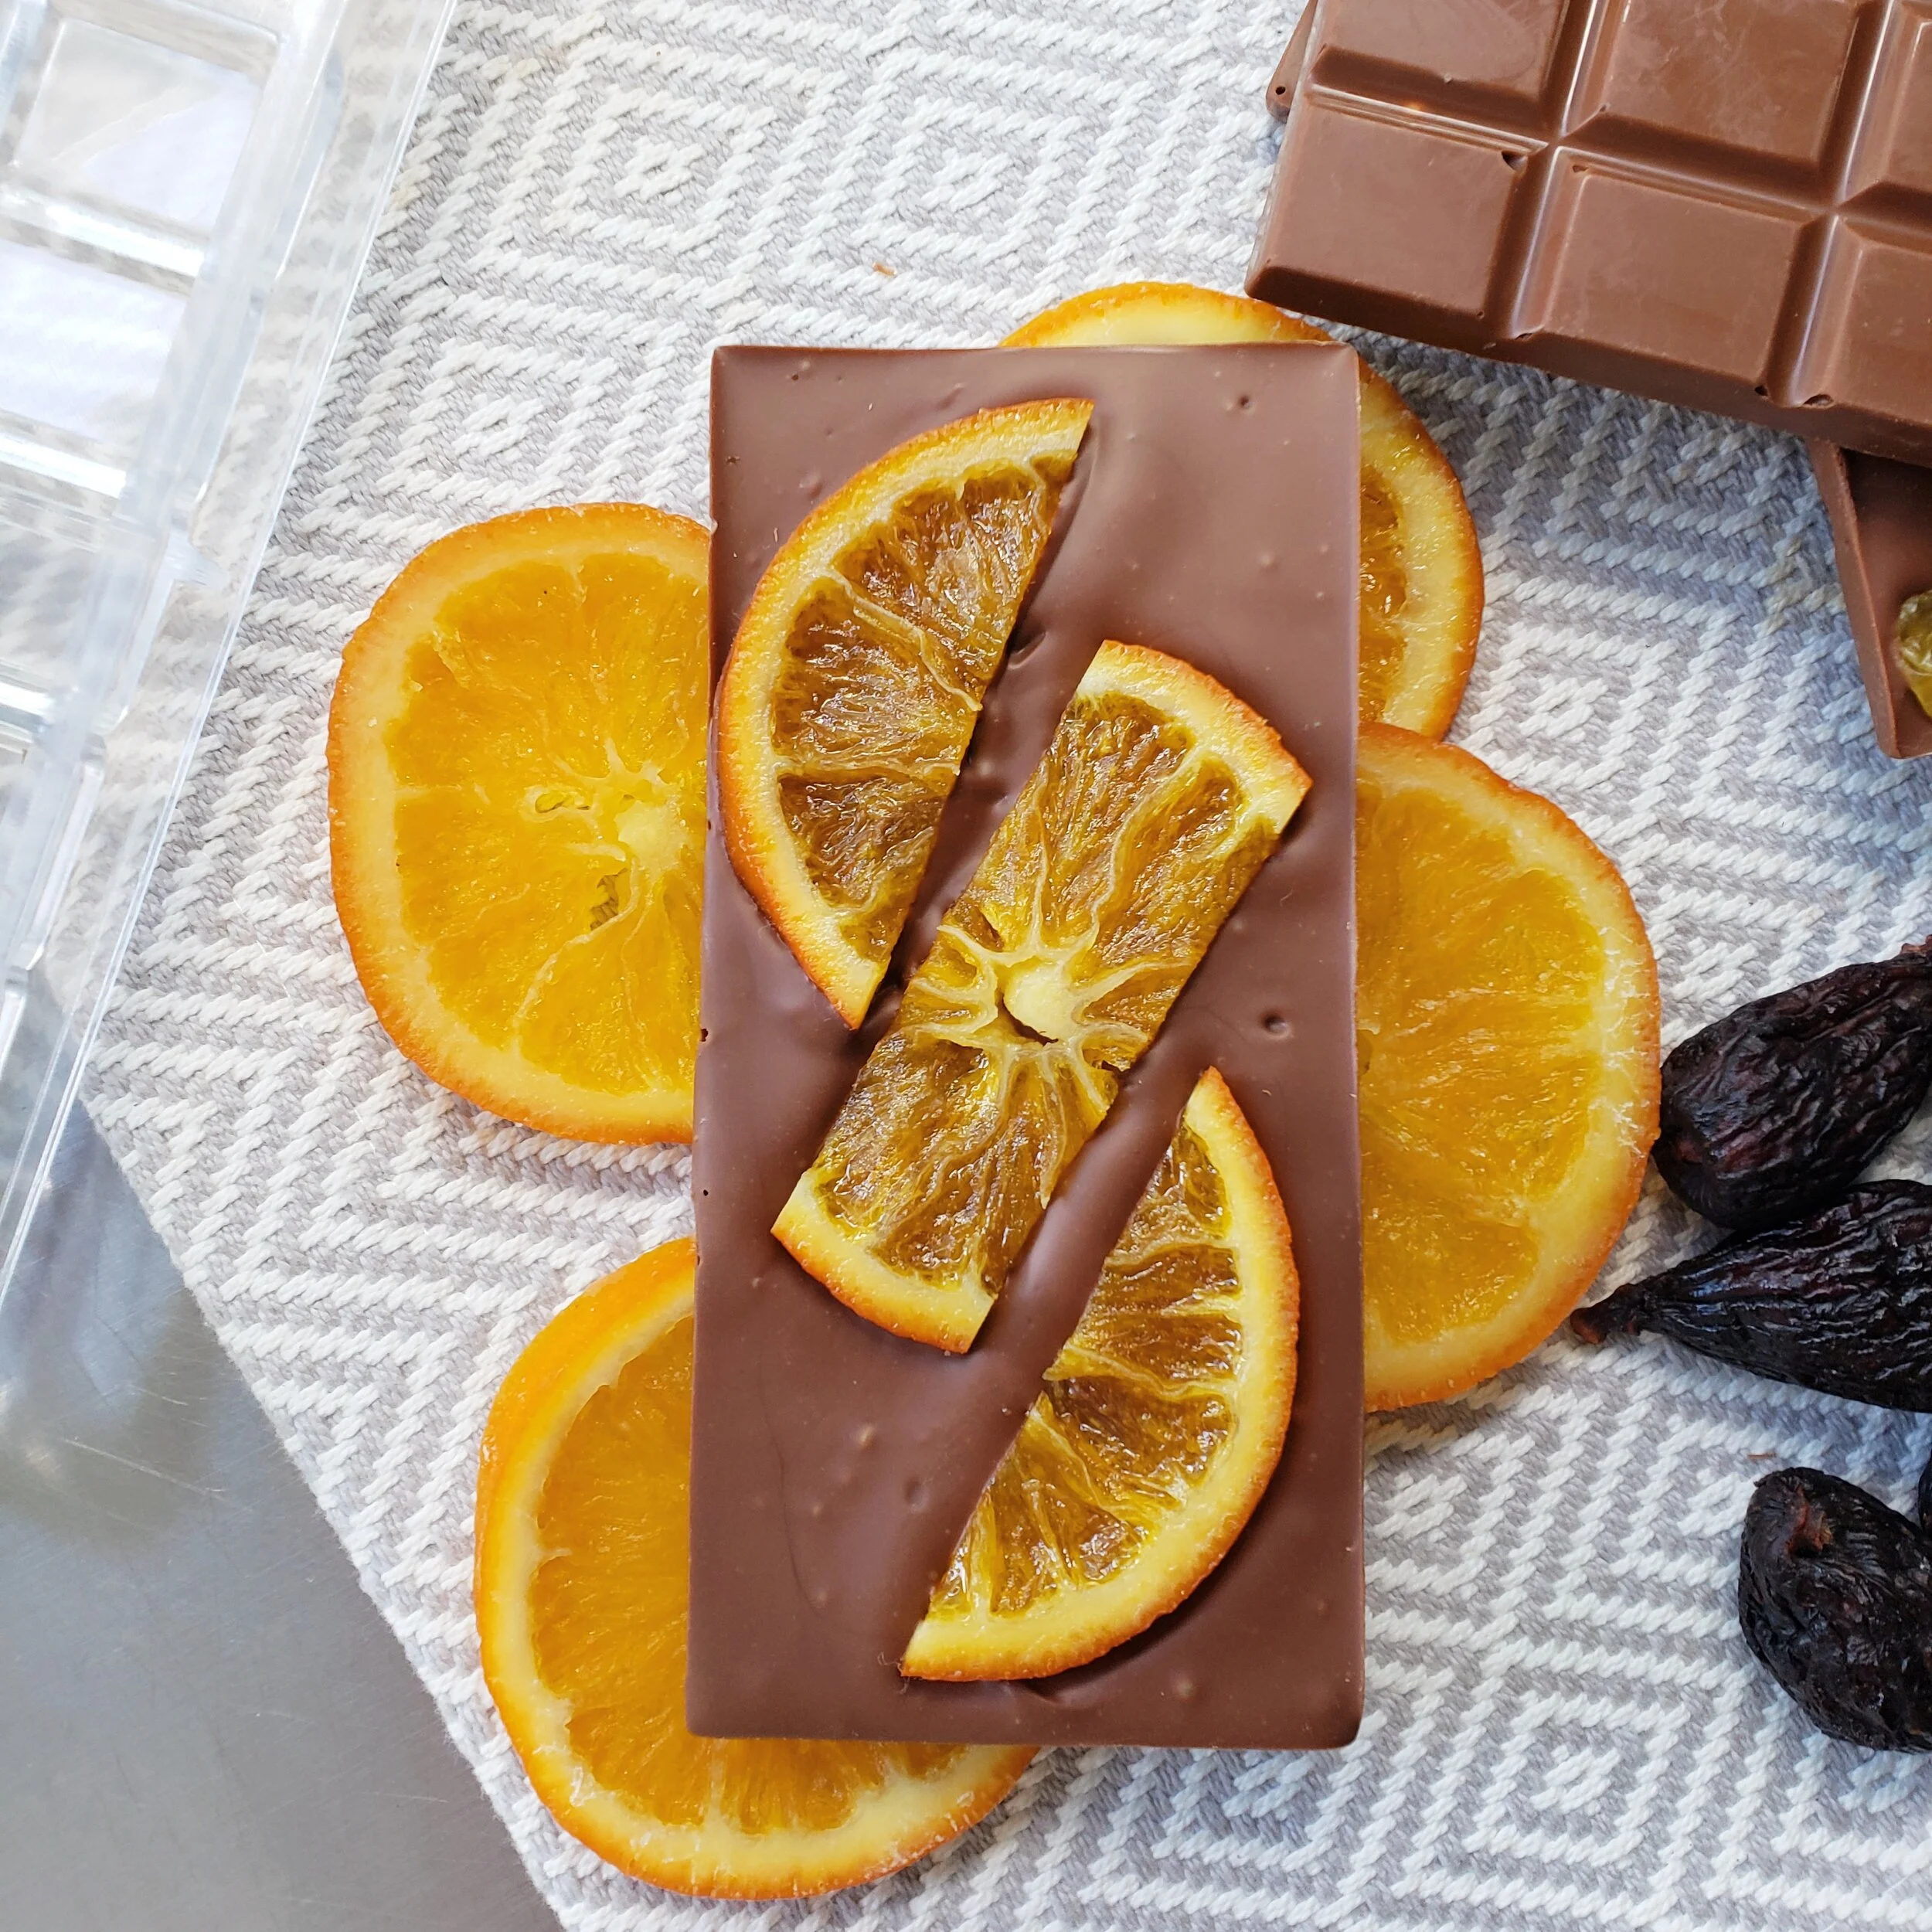
I’ve made 4 milk chocolate bar recipes as inspired by the surge of gourmet bars in the grocery store. Many are topped with dried fruits and nuts. It’s really up to you to tweak the chocolate bar toppings to your liking. To get inspired, I love checking out ice cream flavors. The ice cream industry is quick to adapt to the latest sweets flavor trends. I also love spending time in grocery store aisles to see what ingredients are available. For the chocolate bar, I used Trader Joe’s “Pound Plus Milk Chocolate”, however, feel free to substitute it with dark chocolate or even 72% or higher for a healthier version.
What chocolate to use?
Not all chocolates are created equal. Some are best for baking while others for coating confections. For chocolate bars, we will need to use real chocolate which contains cocoa butter. Most good-quality chocolate bar you can find at the grocery store has cocoa butter in them. A few popular baking brands of chocolate wafers like Guittard are also great options. Just pay attention to the label. For this recipe, I used the “Pound Plus Milk Chocolate” from Trader Joe’s. Baking chocolate chips are unfortunately not ideal because the lack of cocoa butter will result in a dull and grainy chocolate bar. Refer to the list below.
Options: milk chocolate, dark chocolate, semi-sweet chocolate, 72% chocolate (choose the one you enjoy most)

Here are other options of chocolate to use for coating:
Guittard semi-sweet chocolate wafers (Also, available at Winco Bulk Section)
Trader Joe’s “Pound Plus” block of chocolate (Available in milk chocolate, dark chocolate, and 72% dark chocolate)
most bean-to-bar chocolate or your favorite bar with cocoa butter content

What equipment do you need?
For tempering…
Food thermometer or spatula thermometer (pictured below)
glass or metal bowl and a small pot for a double boiler
parchment paper or a spoon to test if the chocolate is tempered right
towel
For making chocolate bars…
pastry bag or ziplock bag
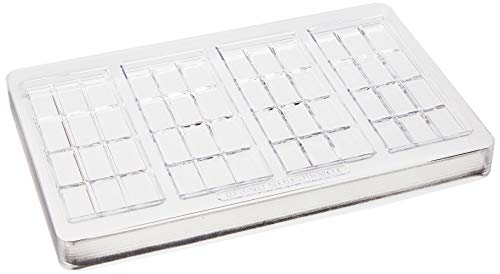
polycarbonate or silicone chocolate mold
I personally prefer using a polycarbonate mold because it makes a shinier chocolate surface. Craft stores like Michael’s often only carry silicone molds. Amazon has plenty of polycarbonate chocolate molds available. For home bakers, silicone molds are more popular for their ease of use, however, if you see yourself doing this a lot more in the future, a polycarbonate mold is an investment. Most chocolatiers use them for better results.
Scroll to the bottom to see troubleshooting guides.


Why temper chocolate?
Compound vs Real Chocolate
Chocolate couverture or real chocolate contains cocoa butter and is best to use for coating. The proverbial “melts in your mouth, not in your hands” stems from the fact that cocoa butter melts at body temperature. Melting real chocolate alters its molecular structure resulting in a dull and chewy mass once cooled. To help the chocolate restructure its molecules back to their original state, tempering is required. Tempered chocolate hardens with a snap and gloss once cooled, just like how it was before melting.
Compound chocolate, on the other hand, is made from lesser quality cacao beans with other forms of fat like vegetable shortening and sugar. Compound chocolate is much cheaper and is often used as an alternative to real chocolate in baking and enrobing.
To make a chocolate bar, we need to use chocolate with cocoa butter content so that it will harden with a shine once cooled. Well-tempered chocolate easily comes off the polycarbonate mold. All you have to do is invert the mold and the chocolate bar should drop on its own without help.

How to temper chocolate?
My preferred method in tempering chocolate is the seeding method using the double boiler. You can also use the microwave to temper your chocolate. Read more about other methods to temper chocolate here.
Note: a thermometer is a must in tempering chocolate. I highly recommend getting a spatula with a built-in thermometer. It gives me a real-time temperature reading while mixing the chocolate.
Double Boiler Seeding Method (the temperature used are for milk chocolate, refer to the temperature chart for dark and white chocolate)
Equipment: double boiler or pot, glass or metal bowls, thermometer, spatula (or thermometer spatula), a small piece of parchment paper, towel
Ingredients: 1 lb. chocolate
Roughly chop the chocolate to help melt them faster without using excess heat.
Fill 1/8 of the pot with water making sure it doesn’t touch the base of the bowl.
Place 2/3 of the chopped chocolate into a glass or metal bowl and place it on the top of the pot at low heat.
Do NOT boil the water, turn it off once it starts to simmer.
Mix chocolate until all lumps are melted making sure that the chocolate temperature does not exceed 113°F. I usually take it out of the heat at around 110°F since the bowl retains some heat. (The temperature is for milk chocolate, refer to the chart below if using dark chocolate).
Take the bowl out of the pot and dry with a towel.
Add half of the remaining chopped chocolate (aka seeds) into the melted chocolate until all lumps are melted; then add the rest of the remaining chopped chocolate and mix until melted.
Keep mixing lowering the temperature to 82°F. Depending on the kind of chocolate you use, this process can take up to 15 minutes. (refer to the chart below to get the right temperatures for the kind of chocolate being used)
Place the bowl back to a heated pot and heat the chocolate to the working temperature of 85°F to 87°F.
Before coating, make sure that the chocolate is tempered correctly by placing a thin coat in a small piece of parchment paper and place in the freezer for 3 minutes. It should come off the parchment paper easily with a gloss and snaps when broken in half. If the parchment paper is not available, you can coat the back of the metal spoon and place it in the freezer for 3 minutes. Just like the parchment paper, well-tempered chocolate should come off the spoon easily.
Check out the troubleshooting below if the chocolate is not tempered properly.
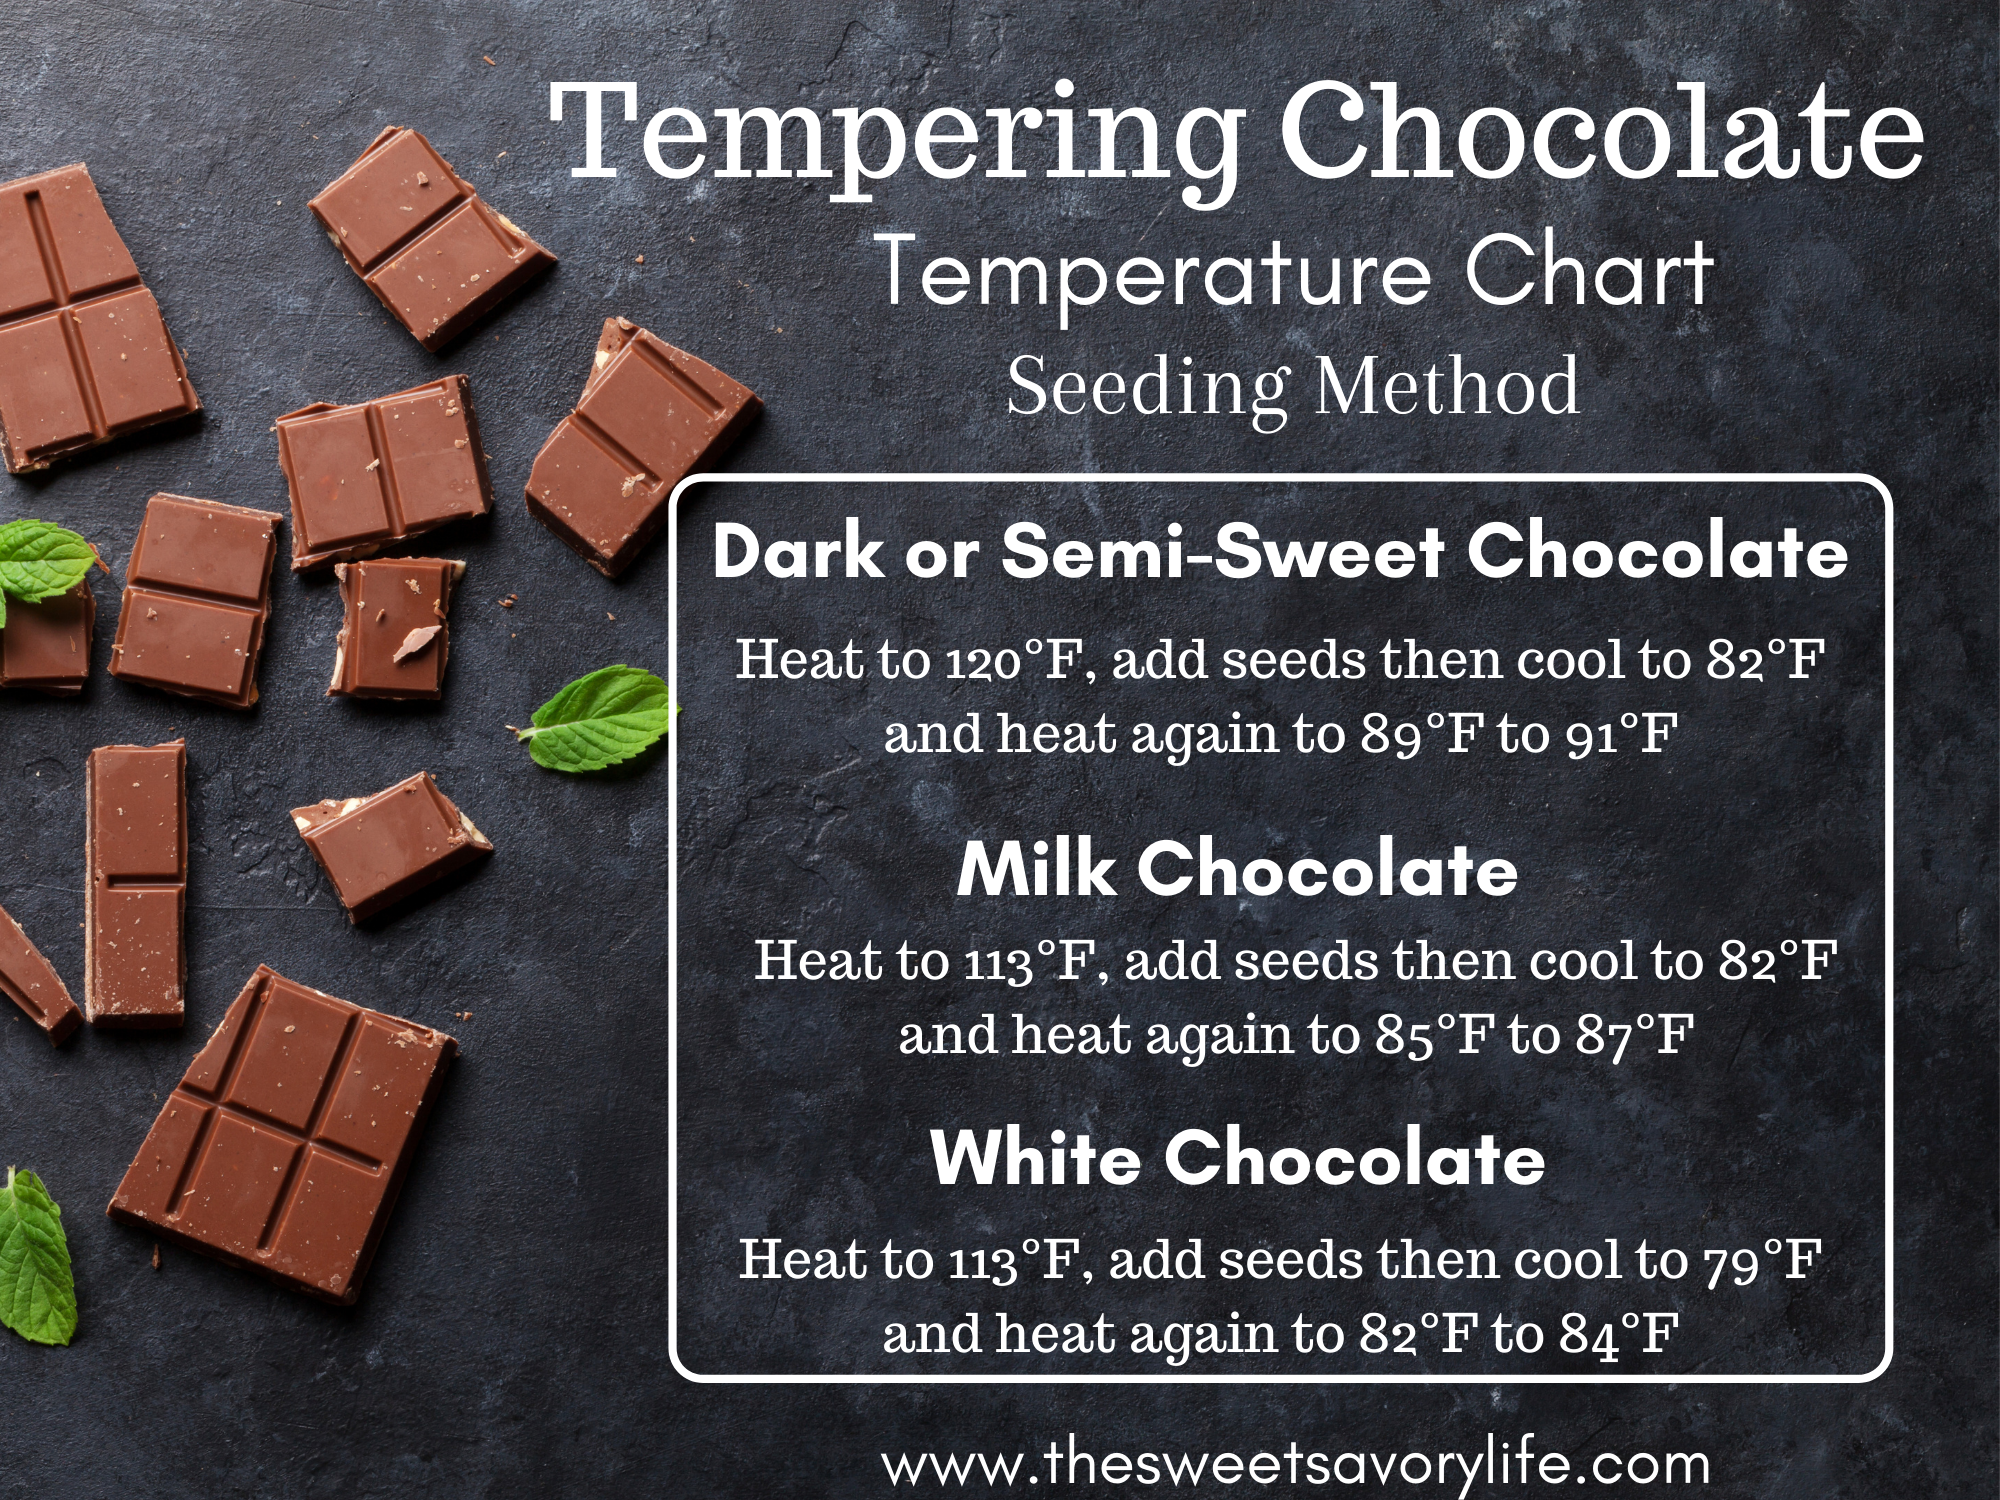
Chocolate Temperature Chart:
Dark or Semi-Sweet Chocolate: heat to 120°F then cool to 82°F and heat again to 89°F to start coating.
Milk Chocolate: heat to 113°F then cool to 81°F and heat again to 86°F.
White Chocolate: heat to 113°F then cool to 79°F and heat again to 82°F.

How to make chocolate bars?
Ingredients:
1/2 lb chocolate makes roughly 6 to 8 bars depending on the size of the mold
candied almonds with coconut - candied almonds + coconut chips (inspired by Almond Joy)
hazelnut figs - roasted hazelnut halved + dried figs halved
fruits and nuts - roasted almonds + raisins + dried fruits (inspired by Cadbury’s Fruits and Nuts)
Directions:
Prepare the molds by wiping them clean and making sure that it’s completely dry. If available, use a microfiber towel to prevent towel lint from sticking to the mold.
Prepare the toppings. (i.e. slice almonds and dried fruits)
Temper chocolate and pour into a pastry bag or ziplock bag.
Pipe tempered chocolate into the mold. Trace the sides first and then pipe in the middle, do not overfill. You need to leave room for the toppings so that the chocolate will not overflow on the sides. After piping the sides, I usually only partially fill the middle. You can always add more chocolate later if needed.
Carefully tap the chocolate mold on the sides and then tap it into a flat surface to flatten the chocolate. I prefer tapping the mold on top a towel.
Place all the toppings on top of the chocolate.
Place chocolate mold in the fridge for 5 minutes to cool. Leaving the chocolate in the fridge longer exposes chocolate to moisture.
If using a polycarbonate mold, check the bottom of the mold first before unmolding the bars. If chocolate is NOT dry, you can see wet streaks in the bottom of the mold.
To unmold from a polycarbonate mold, place a parchment paper (or silicone mat) on a flat surface. Carefully invert the mold toppings side down and lift one side of the mold up. The chocolate bar should come off easily. If not, refer to the troubleshooting guide below.
Fold one side of the silicone mold and carefully take the chocolate bar out.
Store the bars in an individual plastic wrapper or a ziplock at room temperature. Chocolate has a long shelf life, however, your chocolate bar’s shelf life depends on the toppings you used.
These chocolate bars make an excellent gift. Place them inside a clear plastic and wrap them with twines or brown paper.

Troubleshooting…
For tempering…
If you overheated the chocolate, The Spruce Eats detailed how to save it by adding chocolate chunks and vegetable oil. In my experience, however, I prefer to just start over. Pour overheated chocolate into a flat sheet pan and save it for other uses like baking. Overheated chocolate results in a grainy texture that doesn’t harden. It happened to me and I’ve had to carefully remove grainy chocolate from a mold with a toothpick. That was not a pleasant experience!
Chocolate is sensitive to heat and water. Do not boil the water, just simmer and turn it off. Using a food thermometer is a must.
To store leftover tempered chocolate, pour it into a parchment paper or silicone mat and allow it to harden. You can then slice them into smaller chunks ready to be used again for next time. Store in a ziplock bag or an airtight container at room temperature.
For chocolate bars…
I’ve learned while working in a chocolate shop to not clean the polycarbonate molds as often. If needed, we use warm water to melt the chocolate and pat dry with a soft microfiber towel. Sometimes, we use a blow-dry to heat the mold to melt the chocolate and wipe it clean. Aside from tempering, polycarbonate molds can influence the shine of your chocolate. Avoid getting scratches on your molds. Also, do not use soap because the mold may absorb the scent.
Fully cooled chocolate bars should come off the mold easily without any help. If it sticks to the mold, place it back in the fridge for another 3 to 5 minutes. Also, carefully twist the edges of the mold to help it come off. If it still sticks to the mold, it could be that the chocolate is out of temper or that mold is defective.
Why is my chocolate bar not shiny? Most likely, it is because the chocolate is not tempered correctly. There are cases where the mold is not suitable for use. I’ve bought a mold before that was advertised as polycarbonate but it was actually plastic.


