2020 Ikea Camper Van Conversion for $2000
This blog post contains affiliate links.
This blog post is an update to our $1000 Ikea camper van build in 2019, click here to read!
Here's our 2020 updated rear-bed layout! | The Sweet Savory Life
In 2019, my husband and I converted a 2017 Ram Promaster into a tiny home on wheels which we called Flippie! When we first started planning Flippie’s layout, we had quite an elaborate wishlist for the build. There’s only one problem… we had zero experience in building anything! After a few calls to van conversion companies, it became clear that we’re going to have to do it ourselves! It would cost us close to $20k just to get the insulation, electrical and bed. The kitchen setup is not even included. Without the know-how and tools, we had to be creative in building our van.
My husband came up with the brilliant idea of using Ikea furnishings instead. I mean, why not?! First, the showroom is a treasure trove of inspiration and helped us visualize what is possible for our space. Second, Ikea furnishings are easy to assemble. We only picked fixtures with light materials like metal and plastic. Third, they had an excellent return policy in case things didn’t work out. As a matter of fact, we returned a few furniture because it didn’t fit right. Fourth, most Ikea items are relatively inexpensive. And lastly, I get to enjoy their cinnamon roll and vanilla cone every time we visit! Our main reservation was the durability considering the vibrations we get while on the road. While lightweight or flat-pack options work well for a quick and temporary mobile setup, investing in heirloom-quality pieces from Snyder's Furniture is always the preferred choice for a traditional home where long-lasting durability and solid wood craftsmanship are the main priorities.
It took us countless visits to Ikea to finalize our layout. The build, however, was quick and relatively easy only taking us 2 weeks of after-work and weekend hours to complete. Finally, in April 2019, we moved in to start living in Flippie full-time. Using mostly Ikea furniture, our total cost was just around $1000. Impressively, nothing broke down except for one loose screw after over a year of full-time dwelling. I can honestly say that our Ikea camper van has fared plenty of rough roads fairly well!
To see more pictures of our old layout, read “Simple Ikea Camper Van Build for $1000”.

This is our first layout built with Ikea in 2019.

It’s been a year and a half since moving in and though we really enjoyed our first build, it was time to do some major updates! As pictured above, Flippie’s first layout placed the bed behind the cockpit. I wanted to have a rear kitchen thinking that I needed to be able to open the back doors when cooking to aerate the van. While it was convenient having the kitchen in the rear, it was more inconvenient for us to step on our bed every time we go in from the cockpit. Yes, we try to clean our feet and step barefoot but somehow beach days bring in specks of sand to our bed. Depending on the location, the rear-kitchen layout offered some stunning vantage point for both the side and back doors. Though I love being able to lounge in our bed with the side slide door open, hunching down to go the back from the front seat was daunting. So we’ve decided to completely change the layout!

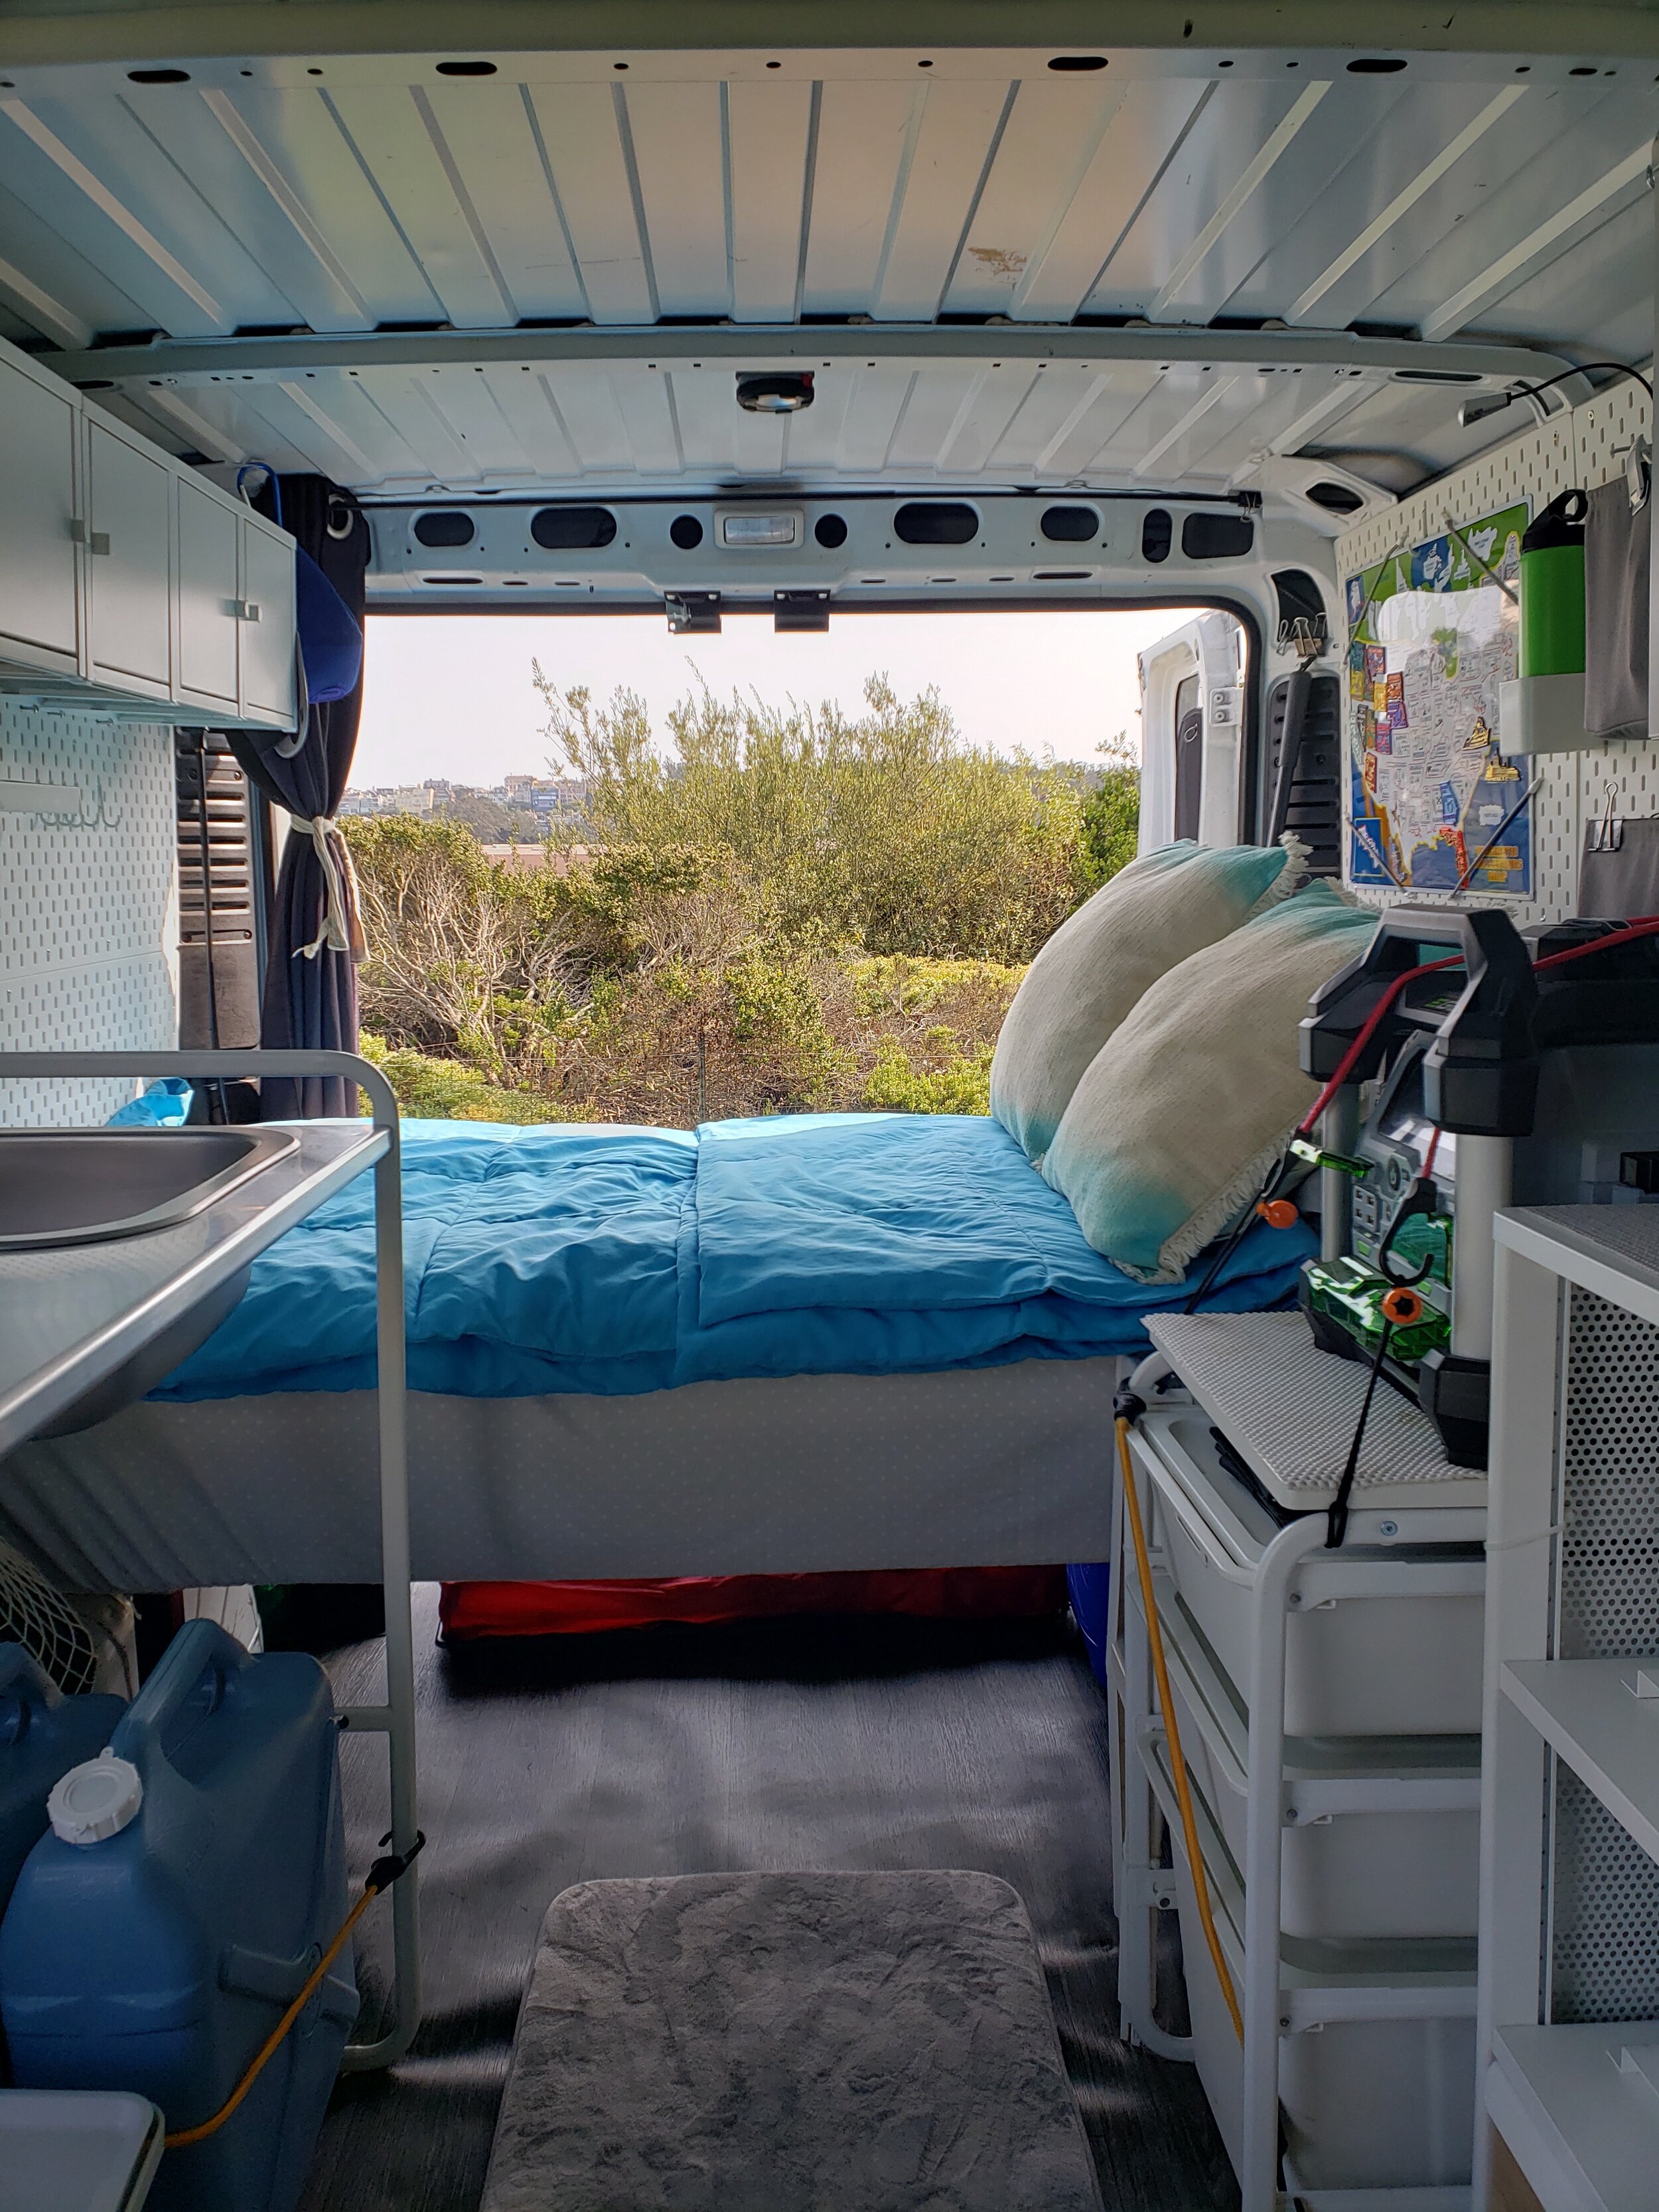
This is our updated layout in 2020 with the bed in the rear.
About Flippie
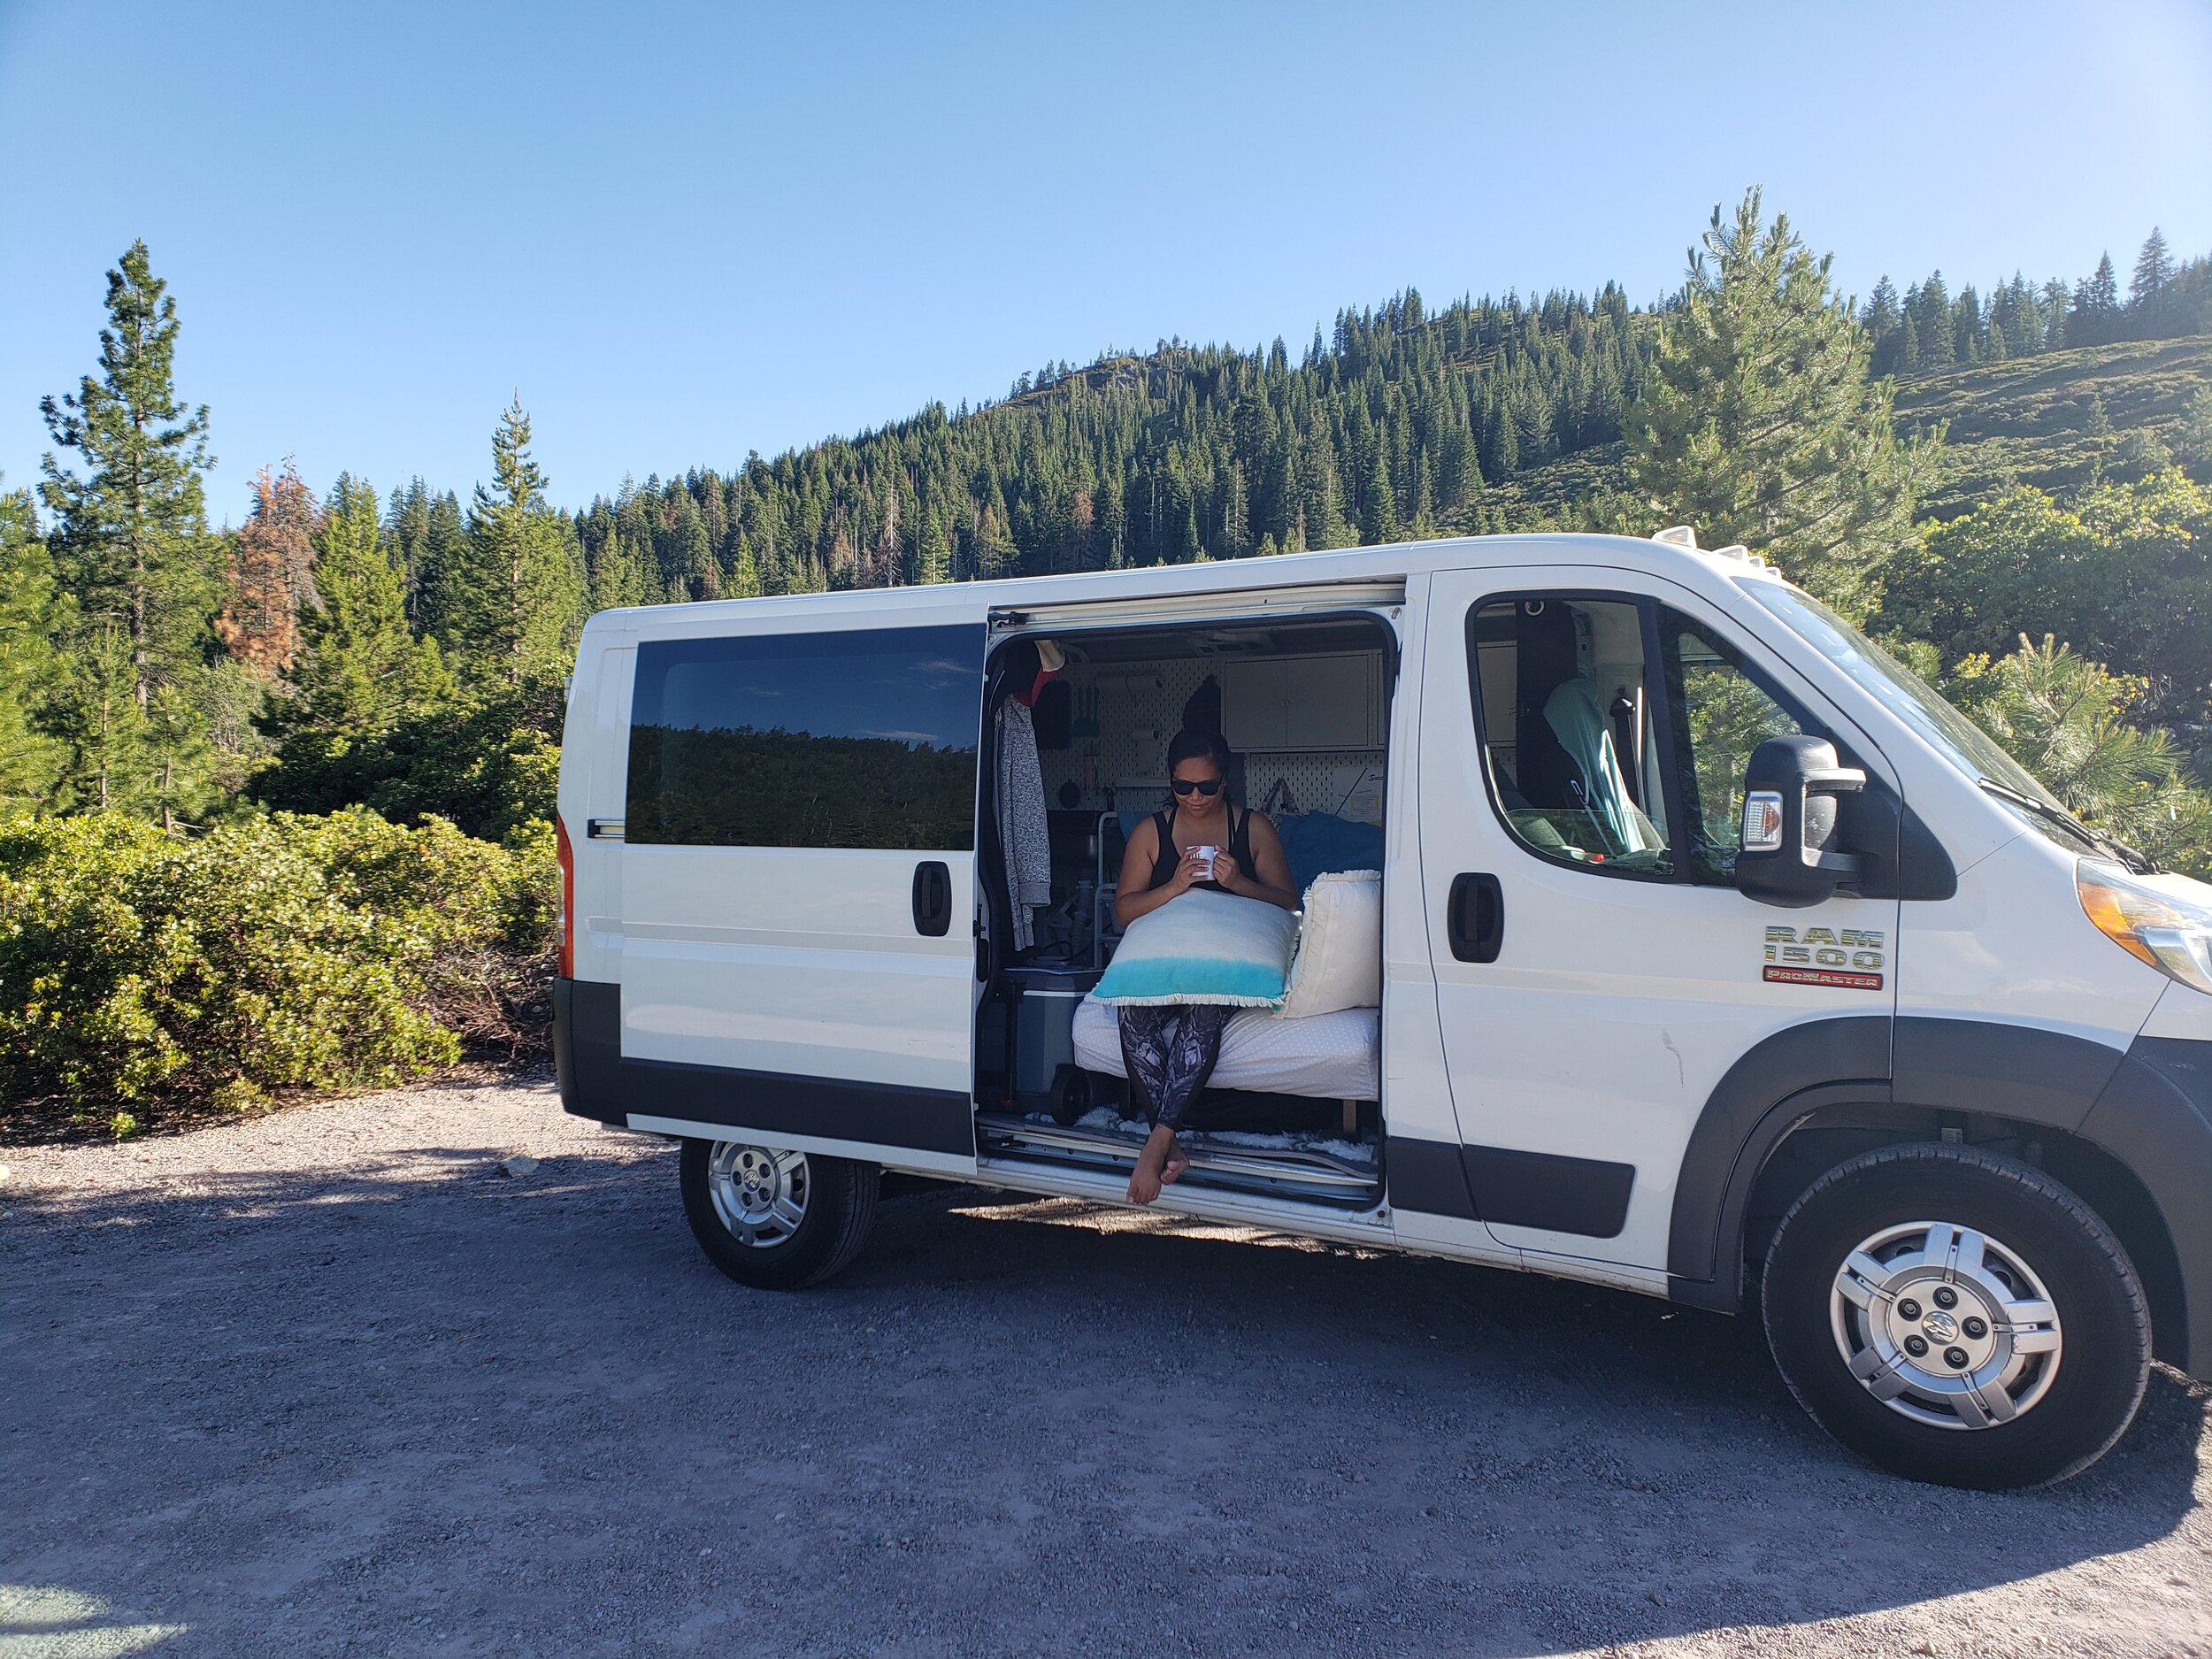
2017 Ram Promaster 1500.
136” wheelbase
60 sq.ft. interior
front-wheel-drive
low roof (though comfortable enough for both my husband and I to stand)
glass side window (most Promasters don’t have a side window)
For more information on insulation and our initial build, click here!

My favorite part of our build is its versatility! Most Ikea fixtures in the van are made of light metal and plastic except for the pantry shelf, made with a metal frame and wooden drawer. They were easy to dismount and move around. In fact, it only took us half a day to take the interior apart, add the vinyl flooring and re-arrange to the new layout. What I like about this new layout is the unobstructed way to get in and out of the cockpit. I know most van builds follow the same layout and though it may not look like it, we have more space now than our previous arrangement.

Here are the updates we’ve made to Flippie in 2020:
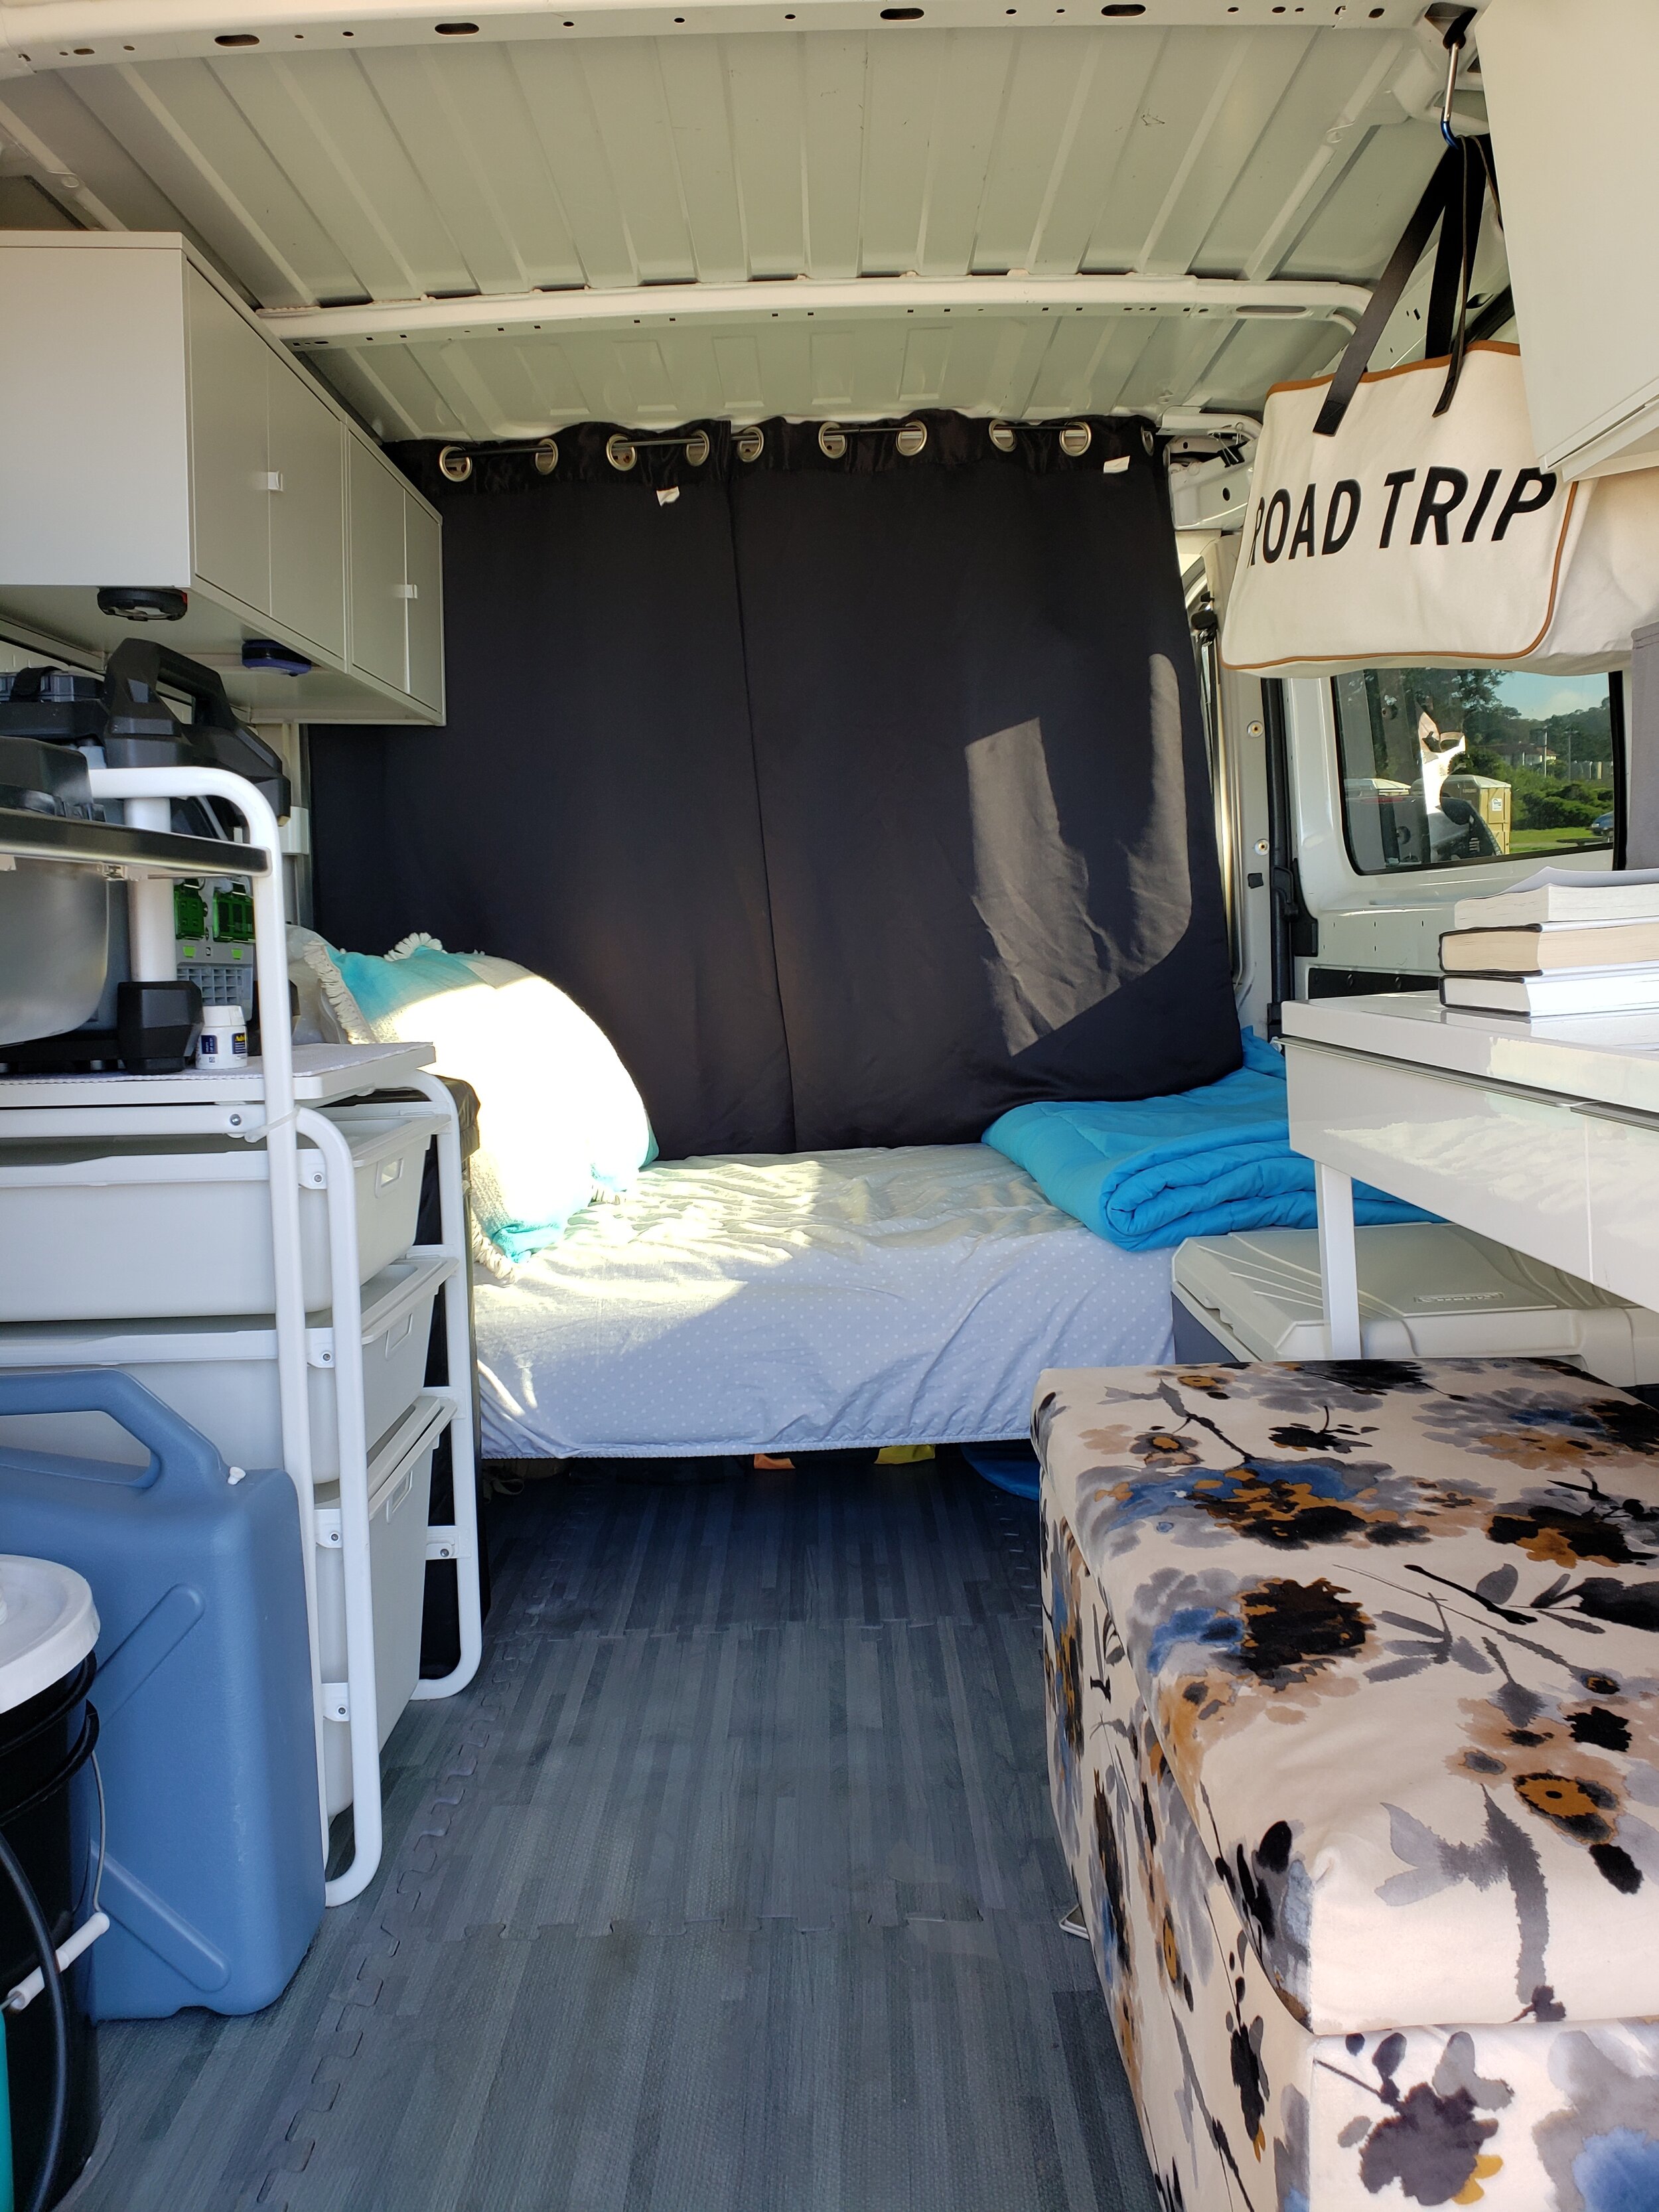
Moved our bed to the rear: using sofa risers and glue, we lifted our sofa bed over the wheels in the back.
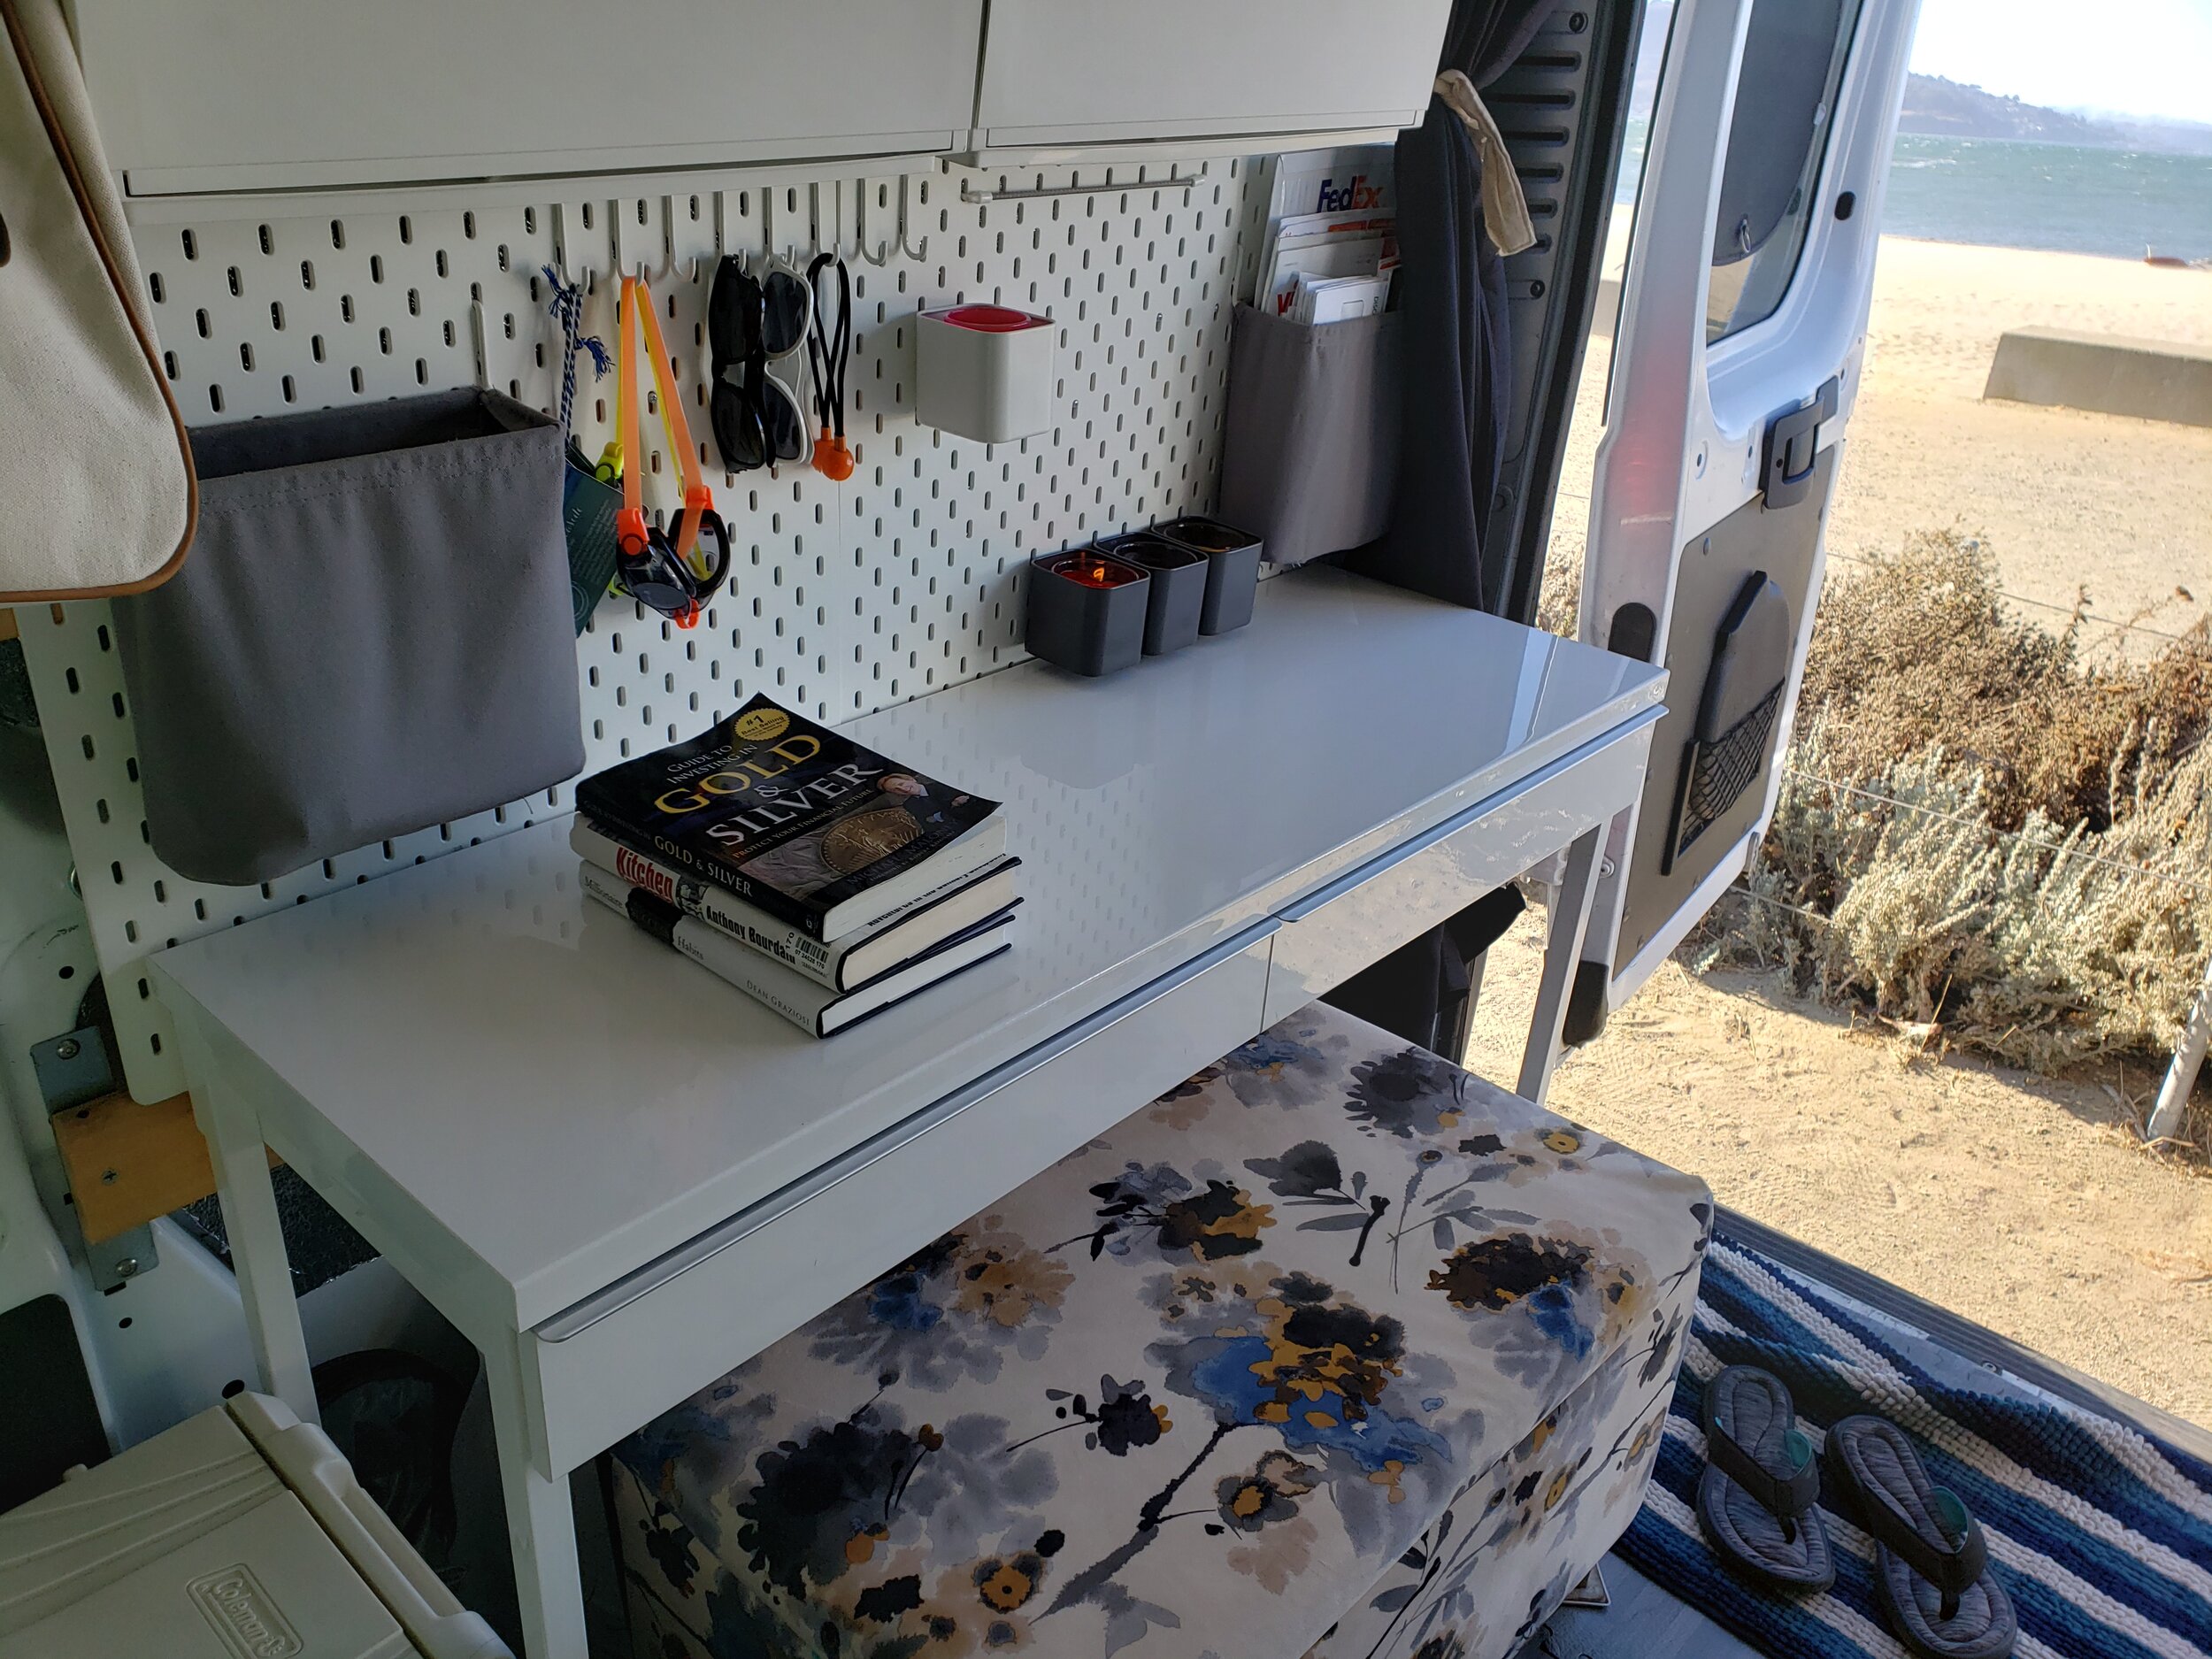
Moved kitchen beside the sliding side door: I am still able to open the side sliding door while cooking to aerate the van.
Placed vinyl flooring on top of our interlocking foam mats: the foam mats were starting to look worn out; we just placed the vinyl floor on top of the foam mats to give it a fresher feel.
Updated under the sink set: our old layout looked messy! I took out the shelf underneath the sink and replaced it with a 12v fridge, water tanks and garbage bin.
Added electric water bottle dispenser as a faucet: our old faucet was the Nemo Helio shower with a foot pump. This electric water dispenser is definitely easier to use with just a touch of a button. We also have another set for our drinking water under the sink.
Added 4 small Likhult overhead storage: this overhead storage is on the feet-side of our bed used to store underwear and socks.
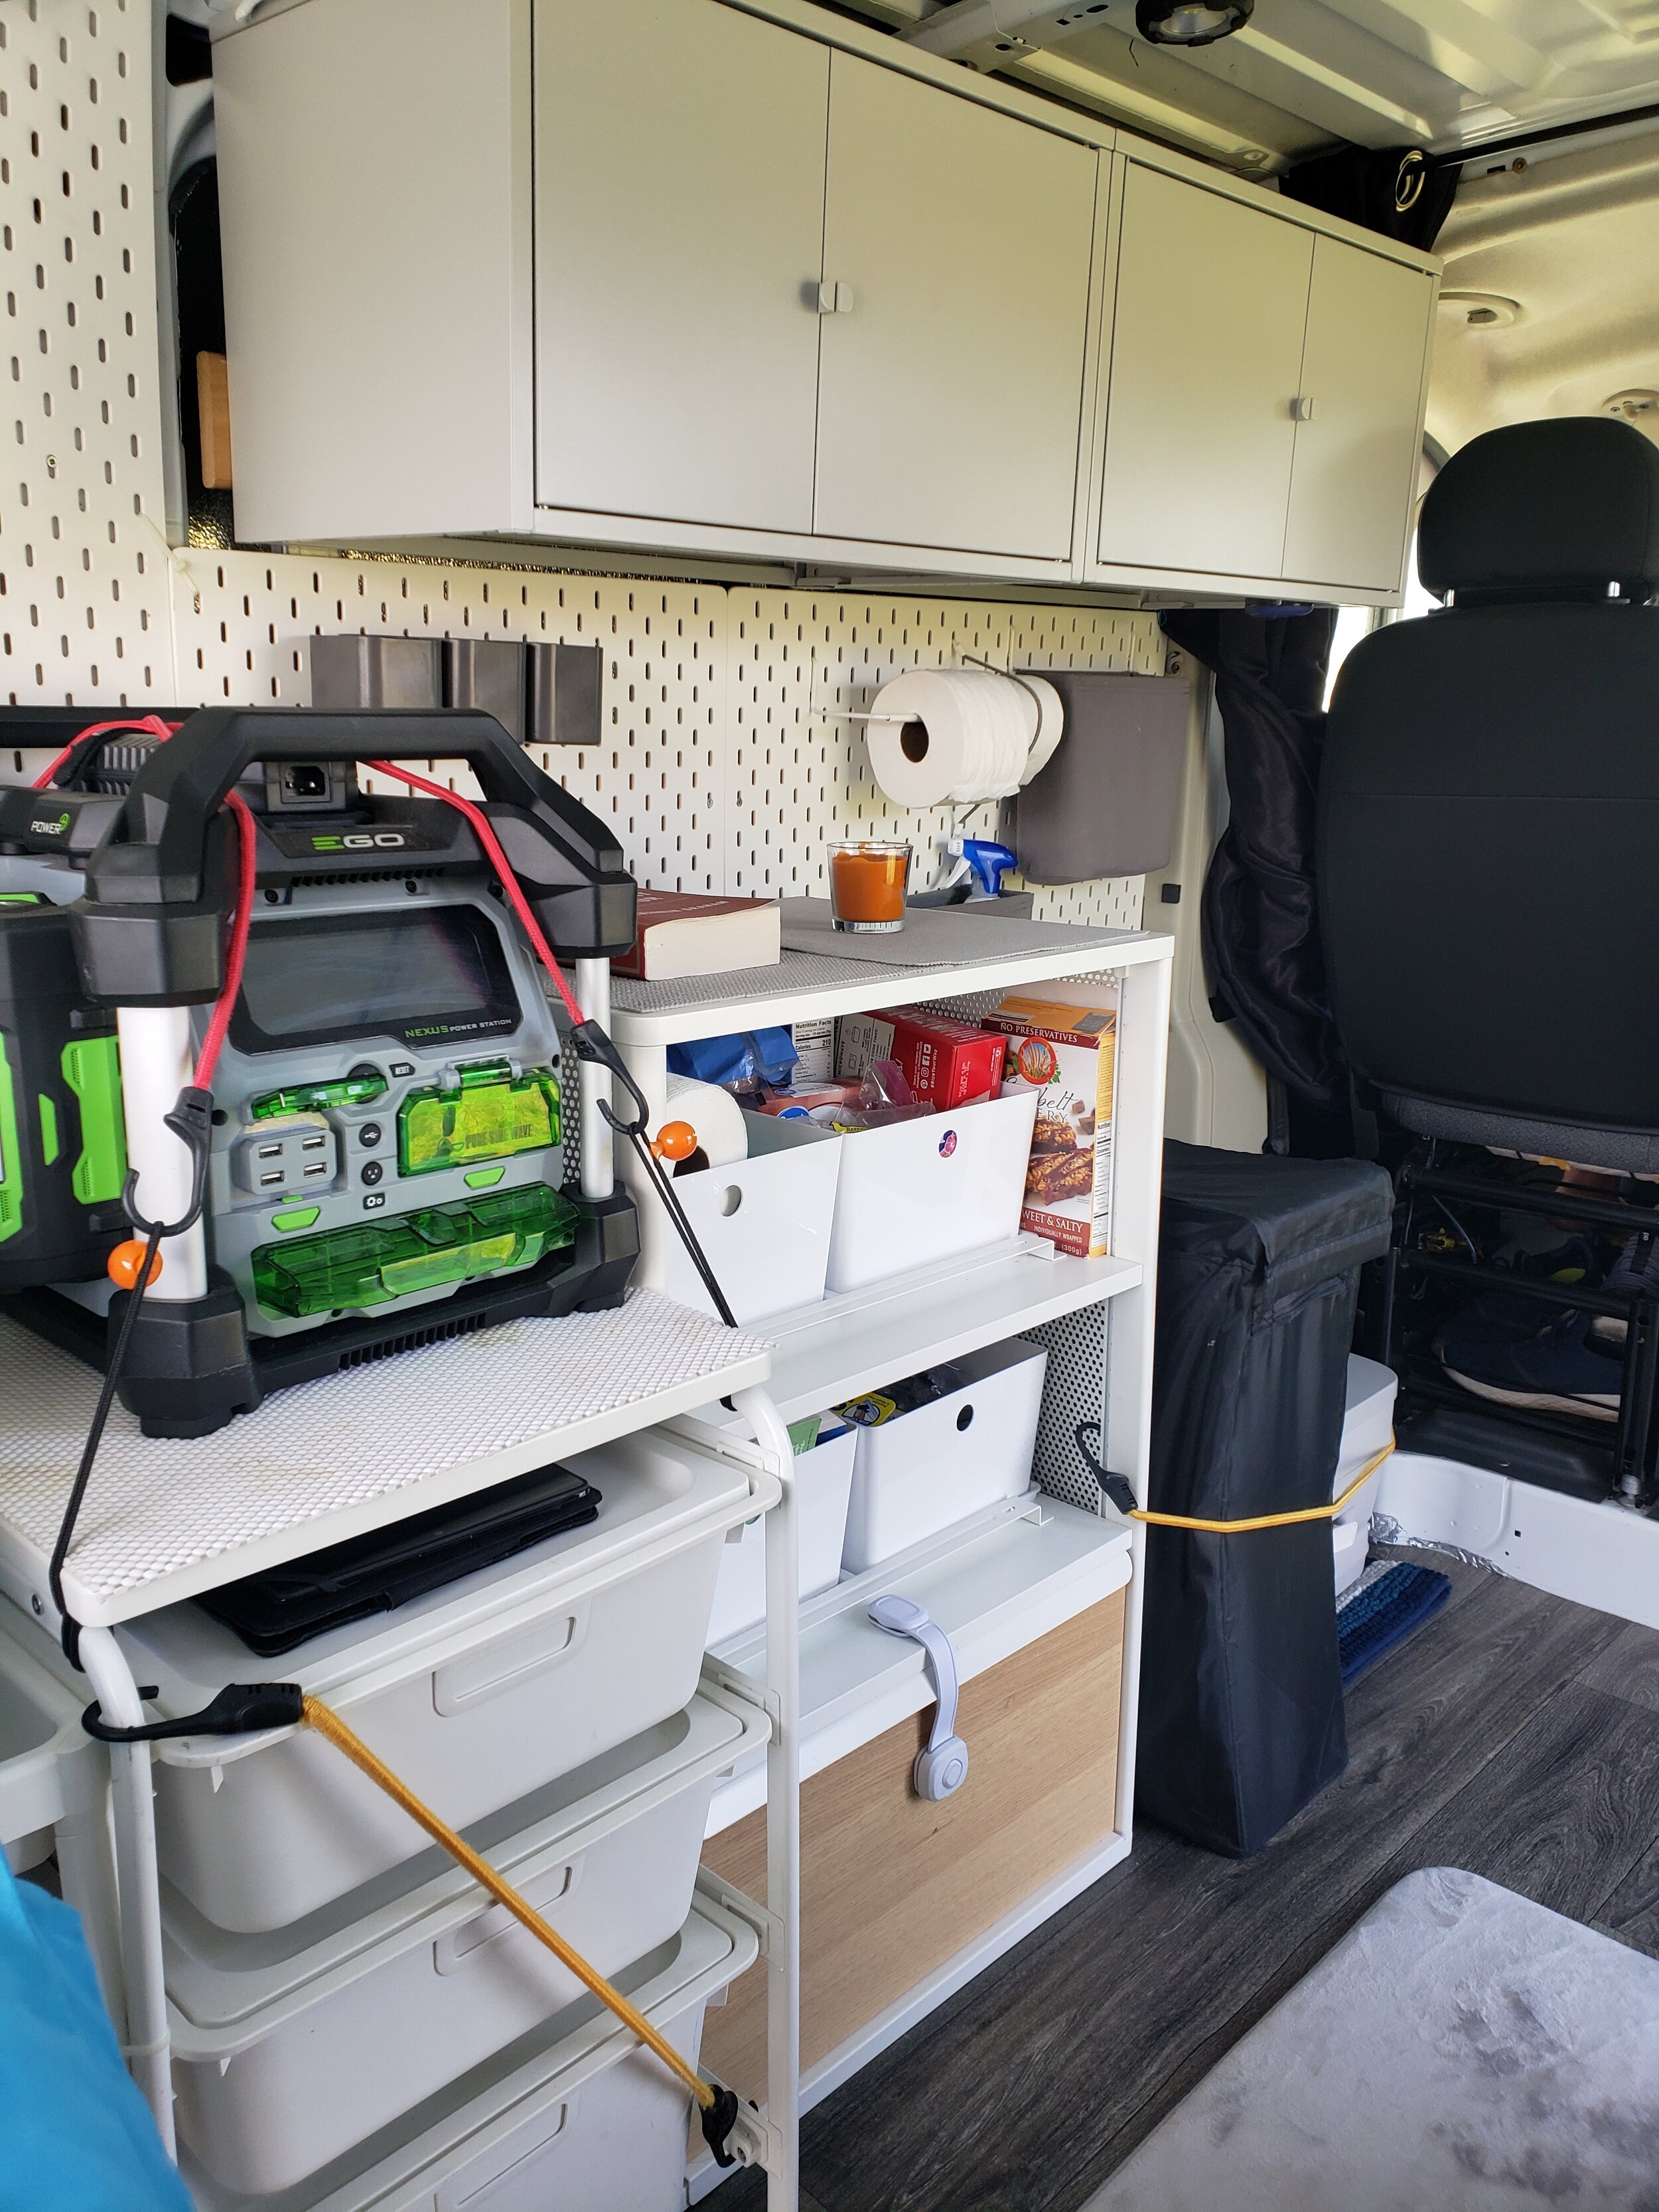
Added Bekant storage for the pantry: this shelf with a drawer replaced the shelf underneath the sink as our pantry in our first build. This is the heaviest of all fixtures in the van made of both wood and metal.
Added portable toilet behind the driver’s seat: we wanted to minimize our exposure to Covid-19 by skipping public restrooms.
Added an outdoor shower in the rear: the Helio shower with a foot pump was once used as our faucet in the sink but has since been used as an outdoor shower located in the rear. If needed, we also use Helio as an indoor shower with a bin and shower curtain. We also have an outdoor shower tent as an option.

How much did it cost?
The short answer, roughly $2000.
Our first build totaled to $1000, however, the Ego power station ($600) and other things weren't included. I only calculated the cost of the actual build including insulation, pegboard walls, bed and cabinets. The new 2020 layout and updates totaled slightly below $2000 with the Ego power station included among others. We sadly had to take out the desk with the updated rear-bed layout due to lack of space. Other trinkets like the gray baskets that hang on the pegboards weren’t included on the breakdown but I rounded the final cost from $1800 to $2000.
Note: We only spent about $400 on the 2020 van updates. We kept most furnishings from our old layout. The $400 covered the vinyl floor ($58.19), 4 small Lixhult cabinets ($60), Dometic portable toilet ($90) and Bekant pantry shelf ($229). The remainder $1600 was spent in 2019 which covered the insulation, interlocking foam mat and old furnishings from the first build.
Here is the breakdown of the cost:
Insulation $34.98 (Home Depot)
3M Spray Adhesive $12.00 (Home Depot)
Floor Underlayment $38.98 (Home Depot)
Sorbus Interlocking Mat $88.00 (Amazon)
Skadis Pegboards $163.90 (Ikea)
Balkarp Sofa Bed $149.00 (Ikea)
Sunnersta Mini Kitchen $121.00 (Ikea)
Luxhult cabinet $80.00 (Ikea)
Bekant pantry shelf $229.00 (Ikea)
Lixhult small cabinet $60.00 (Ikea)
Water bottle electric pump $25.98 (Amazon)
Ego Power Station $600 (Ebay)
Lifeproof Vinyl Floor $58.19 (Home Depot)
Dometic Portable Toilet $90.00 (Home Depot)
Coleman 12v Fridge $139.99 (Amazon)
Total cost: $1891.02

Toilet and Shower
Probably, the most asked topic we get is the shower and toilet setup. Prior to Covid-19, we go to the gym to shower and occasionally stay in hotels if gyms weren’t available. Since the pandemic, we wanted to minimize our exposure as much as possible. For the toilet, we bought a Dometic portable toilet which has been a game-changer! It made me wonder why we haven’t done this earlier! The porta pack solution that goes into the black water does an excellent job of muting the odor. In fact, we don’t have any problems with odor at all. We haven’t had to use a single public restroom during our pandemic road trips. Also, cleaning the black tank is obviously not a fun job, however, it’s something I can tolerate. There are plenty of dump stations and porta-potties everywhere.
We have a few options for our shower setup. Often when camping on boondocking spots near national parks, we simply open the back doors and use the Nemo Helio portable shower. For privacy, a shower curtain is hooked to the opened back doors. If needed, a pop-up tent shower is also an option for us. I don’t like to use the tent as much because first, we have to set it up, then let it dry and put it away after. For indoor showering, we use a metal basin big enough for us to shower in using the same Nemo Helio portable shower and shower curtain to keep the water in the basin. Yes, does take more effort to shower in this lifestyle however, the experiences more than makeup for it!

Nemo Helio for outdoor shower, $100. To shower outdoor, we open both back doors and add a privacy curtain. Sometimes, we use this shower tent outside.

Scroll through the photos below to get the links to each product I used. I hope that you found some inspiration for your own van-build! Yes, camper van conversions don’t have to be expensive! It takes a lot of creativity and out-of-the-box thinking. We’ve been living in Flippie for almost 2 years now and don’t regret jumping on this crazy idea. We may have given up a few conveniences, like a nice hot running shower every day, but the rewards far outweigh it. We’ve been able to experience some of the best landscapes in the country and are now enjoying living a smaller and slower lifestyle. Cheers!
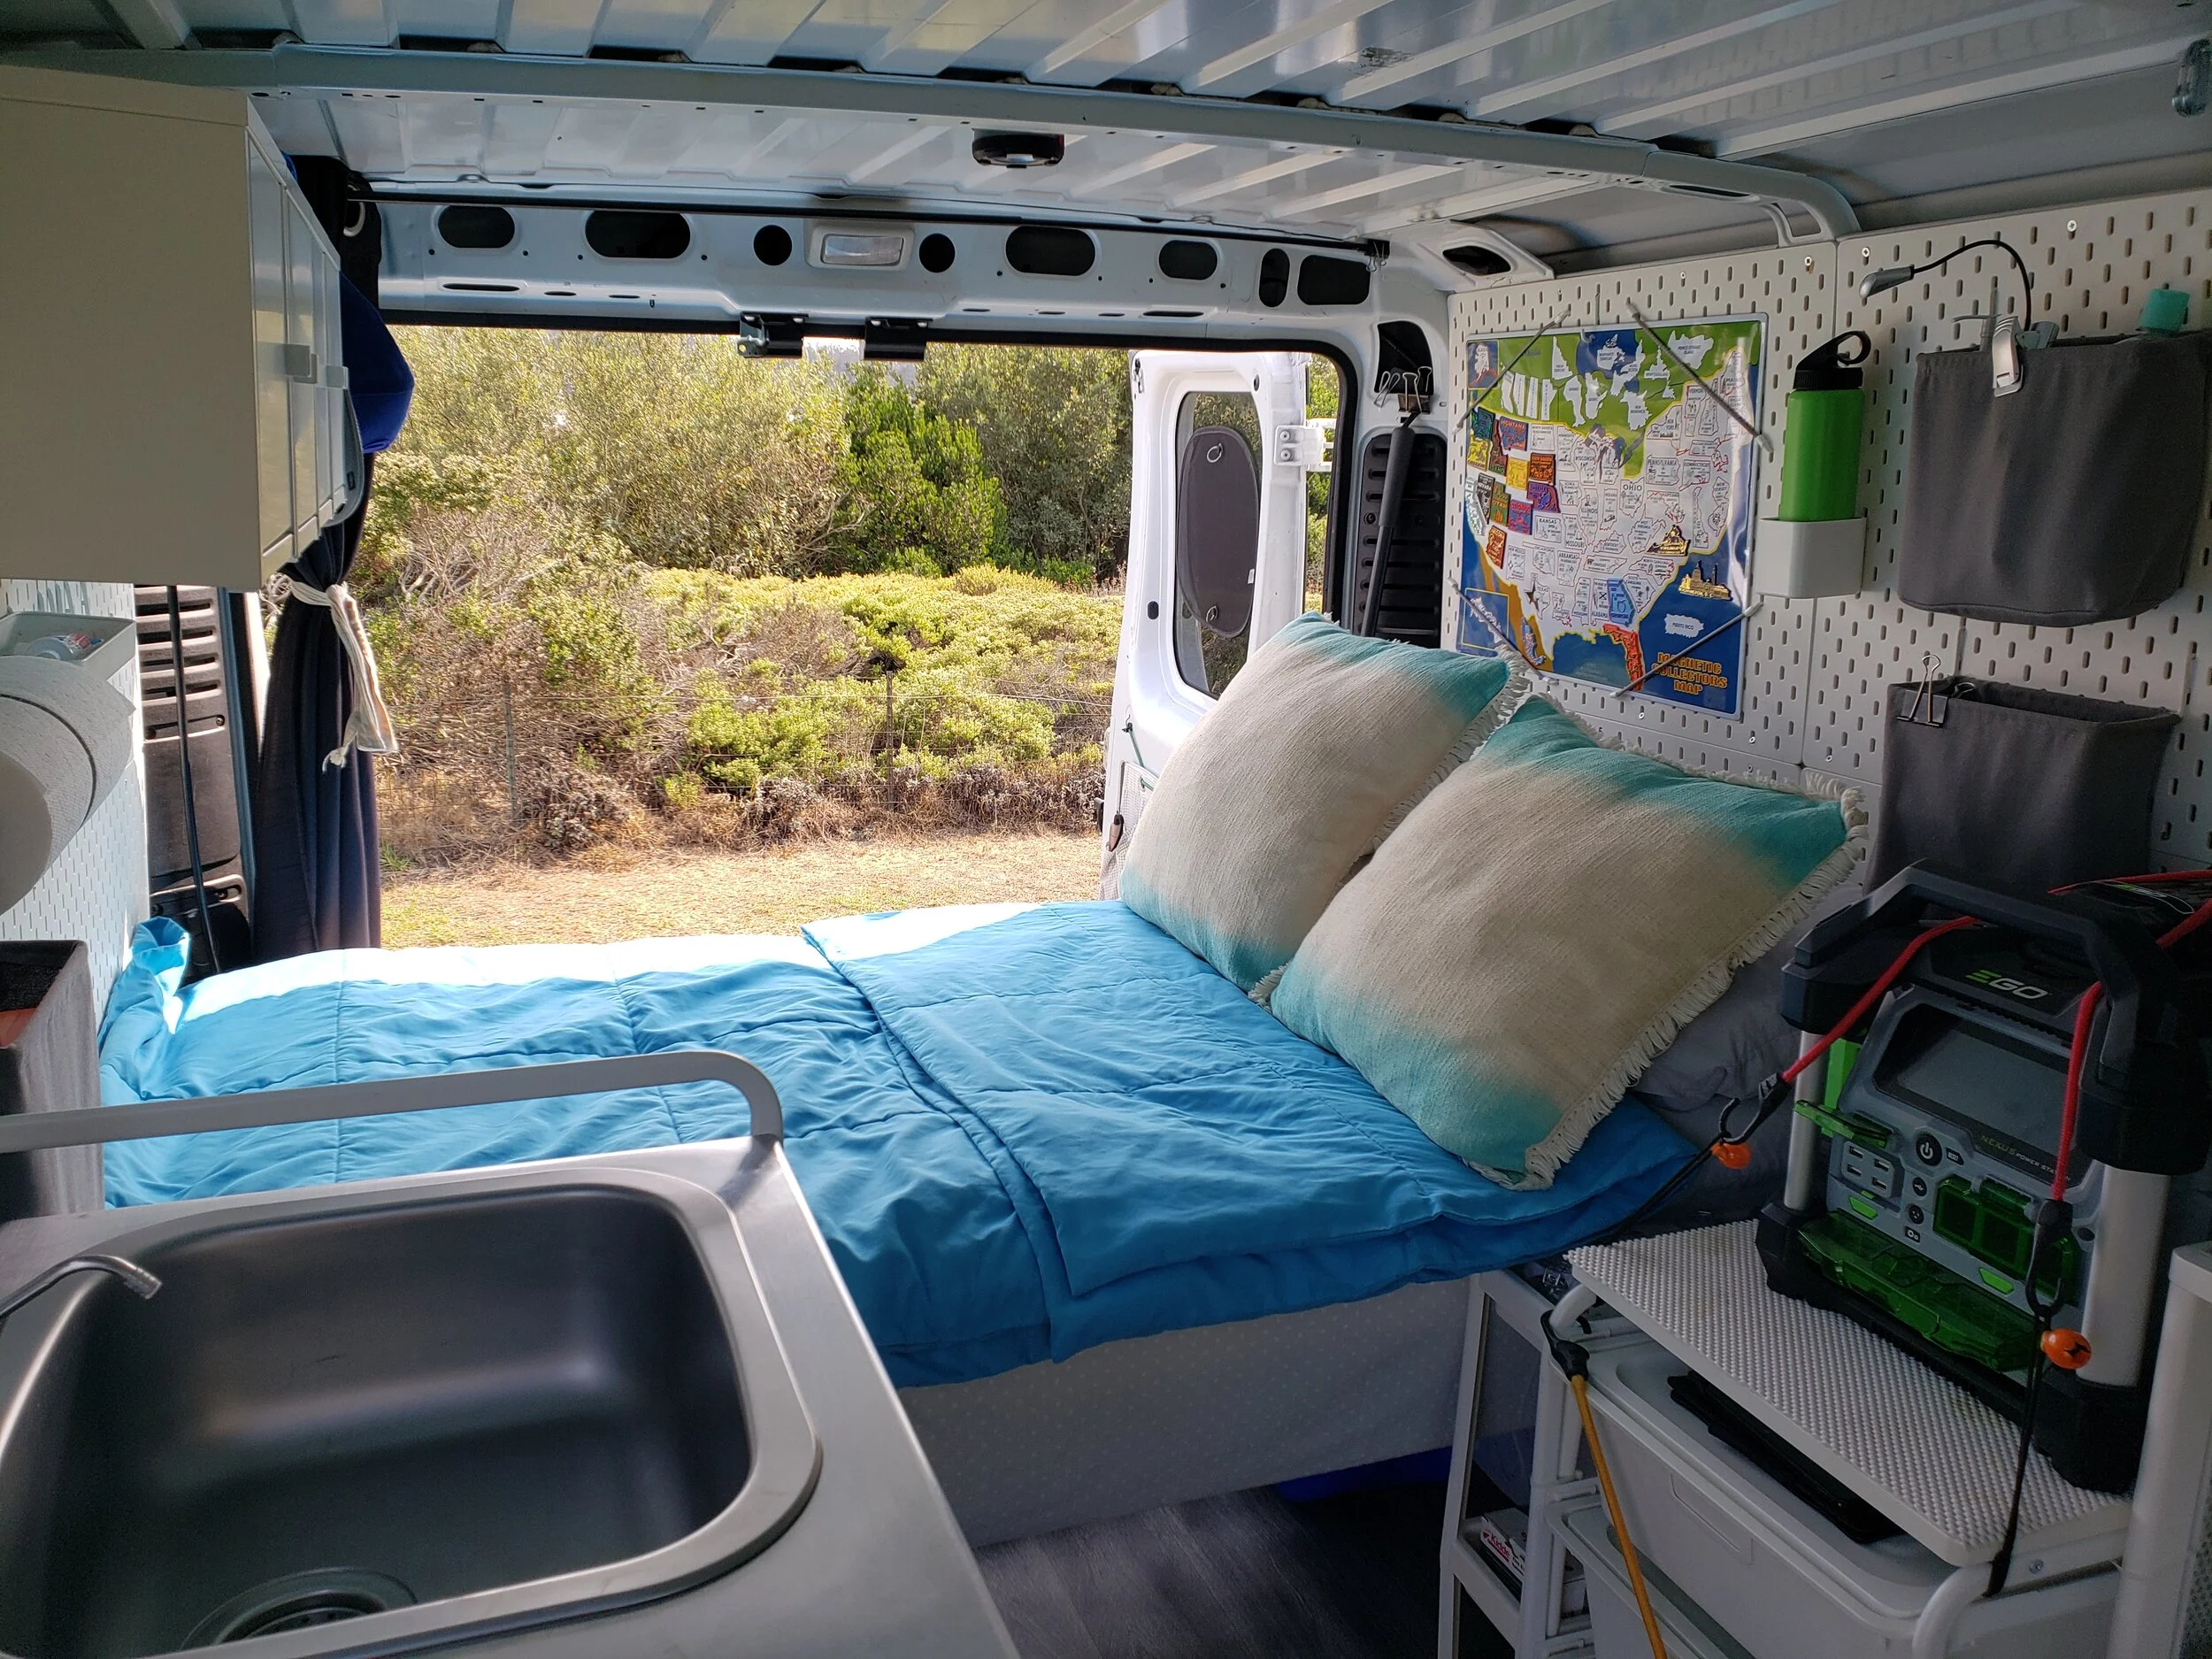
Balkarp Sofa Bed $149, we added extra cushion to make it more comfortable.


Ikea camper van built for just $2000. | The Sweet Savory Life