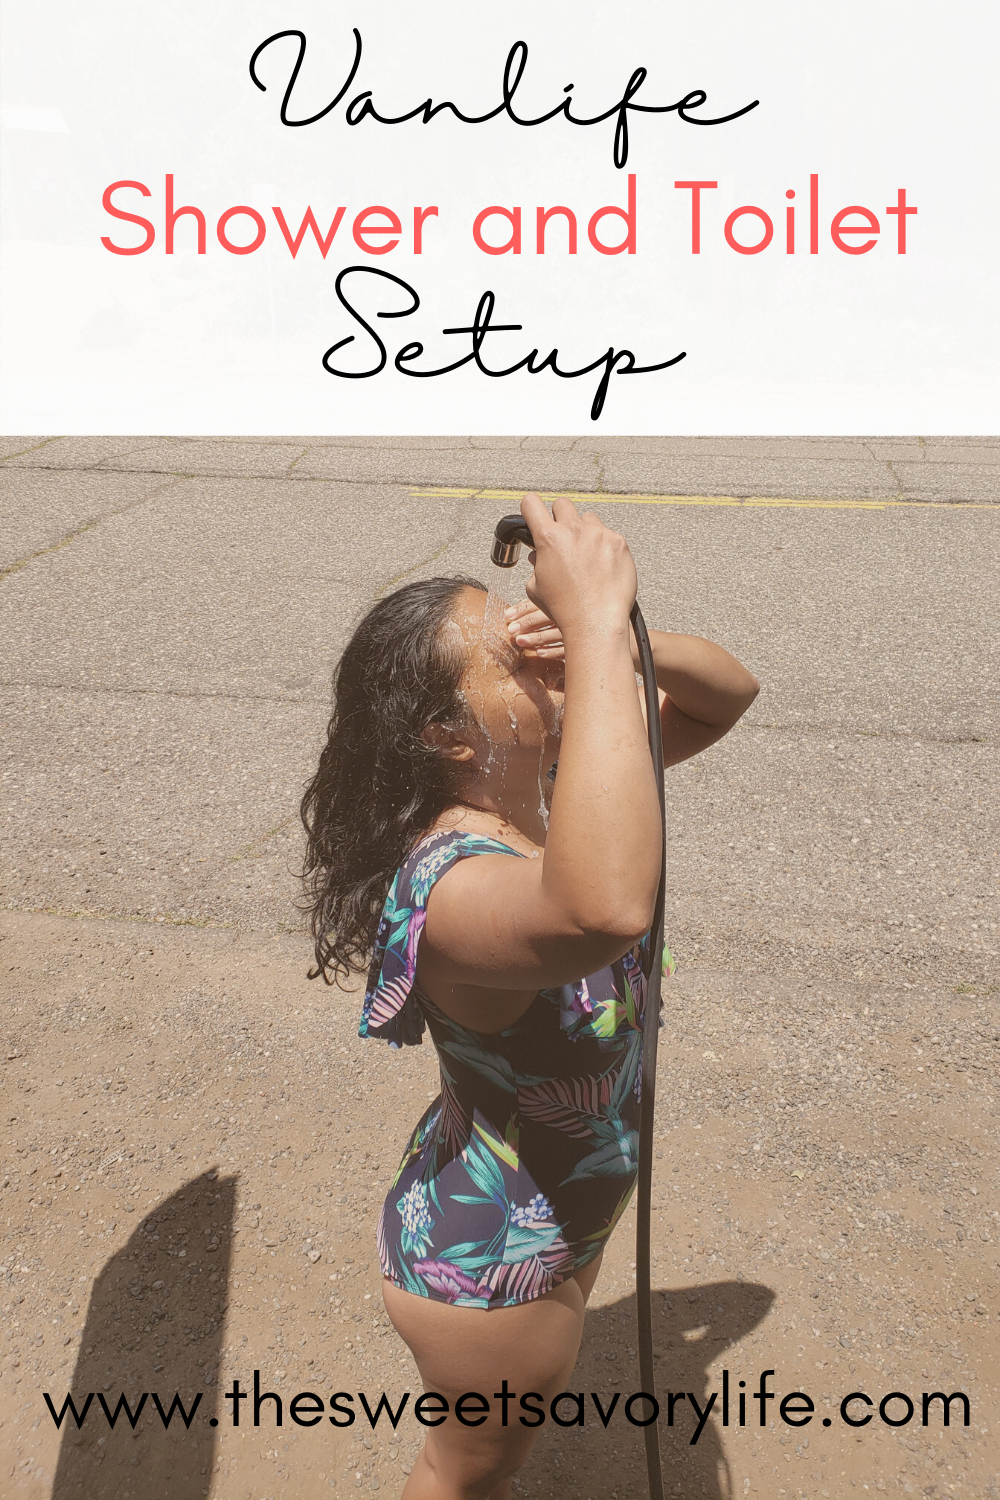
Shower and Toilet in Our Campervan
This post contains affiliate links.
One of the most asked questions we get about van-dwelling is our shower and toilet situation. Our $2000 Ikea campervan conversion unfortunately does not include a built-in shower. Pre-COVID, we heavily relied on public restrooms and the gym when in the city or use campground showers when in national parks. To reduce our exposure to COVID-19, we’ve decided to buy a portable toilet and have both an indoor and outdoor shower setup.
Vanlife toilet and shower setup! | The Sweet Savory Life
The Toilet…
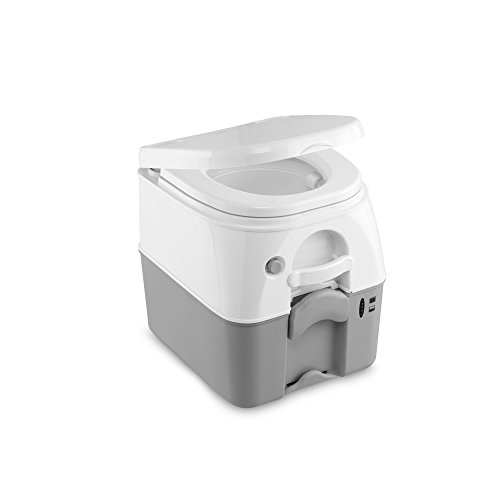
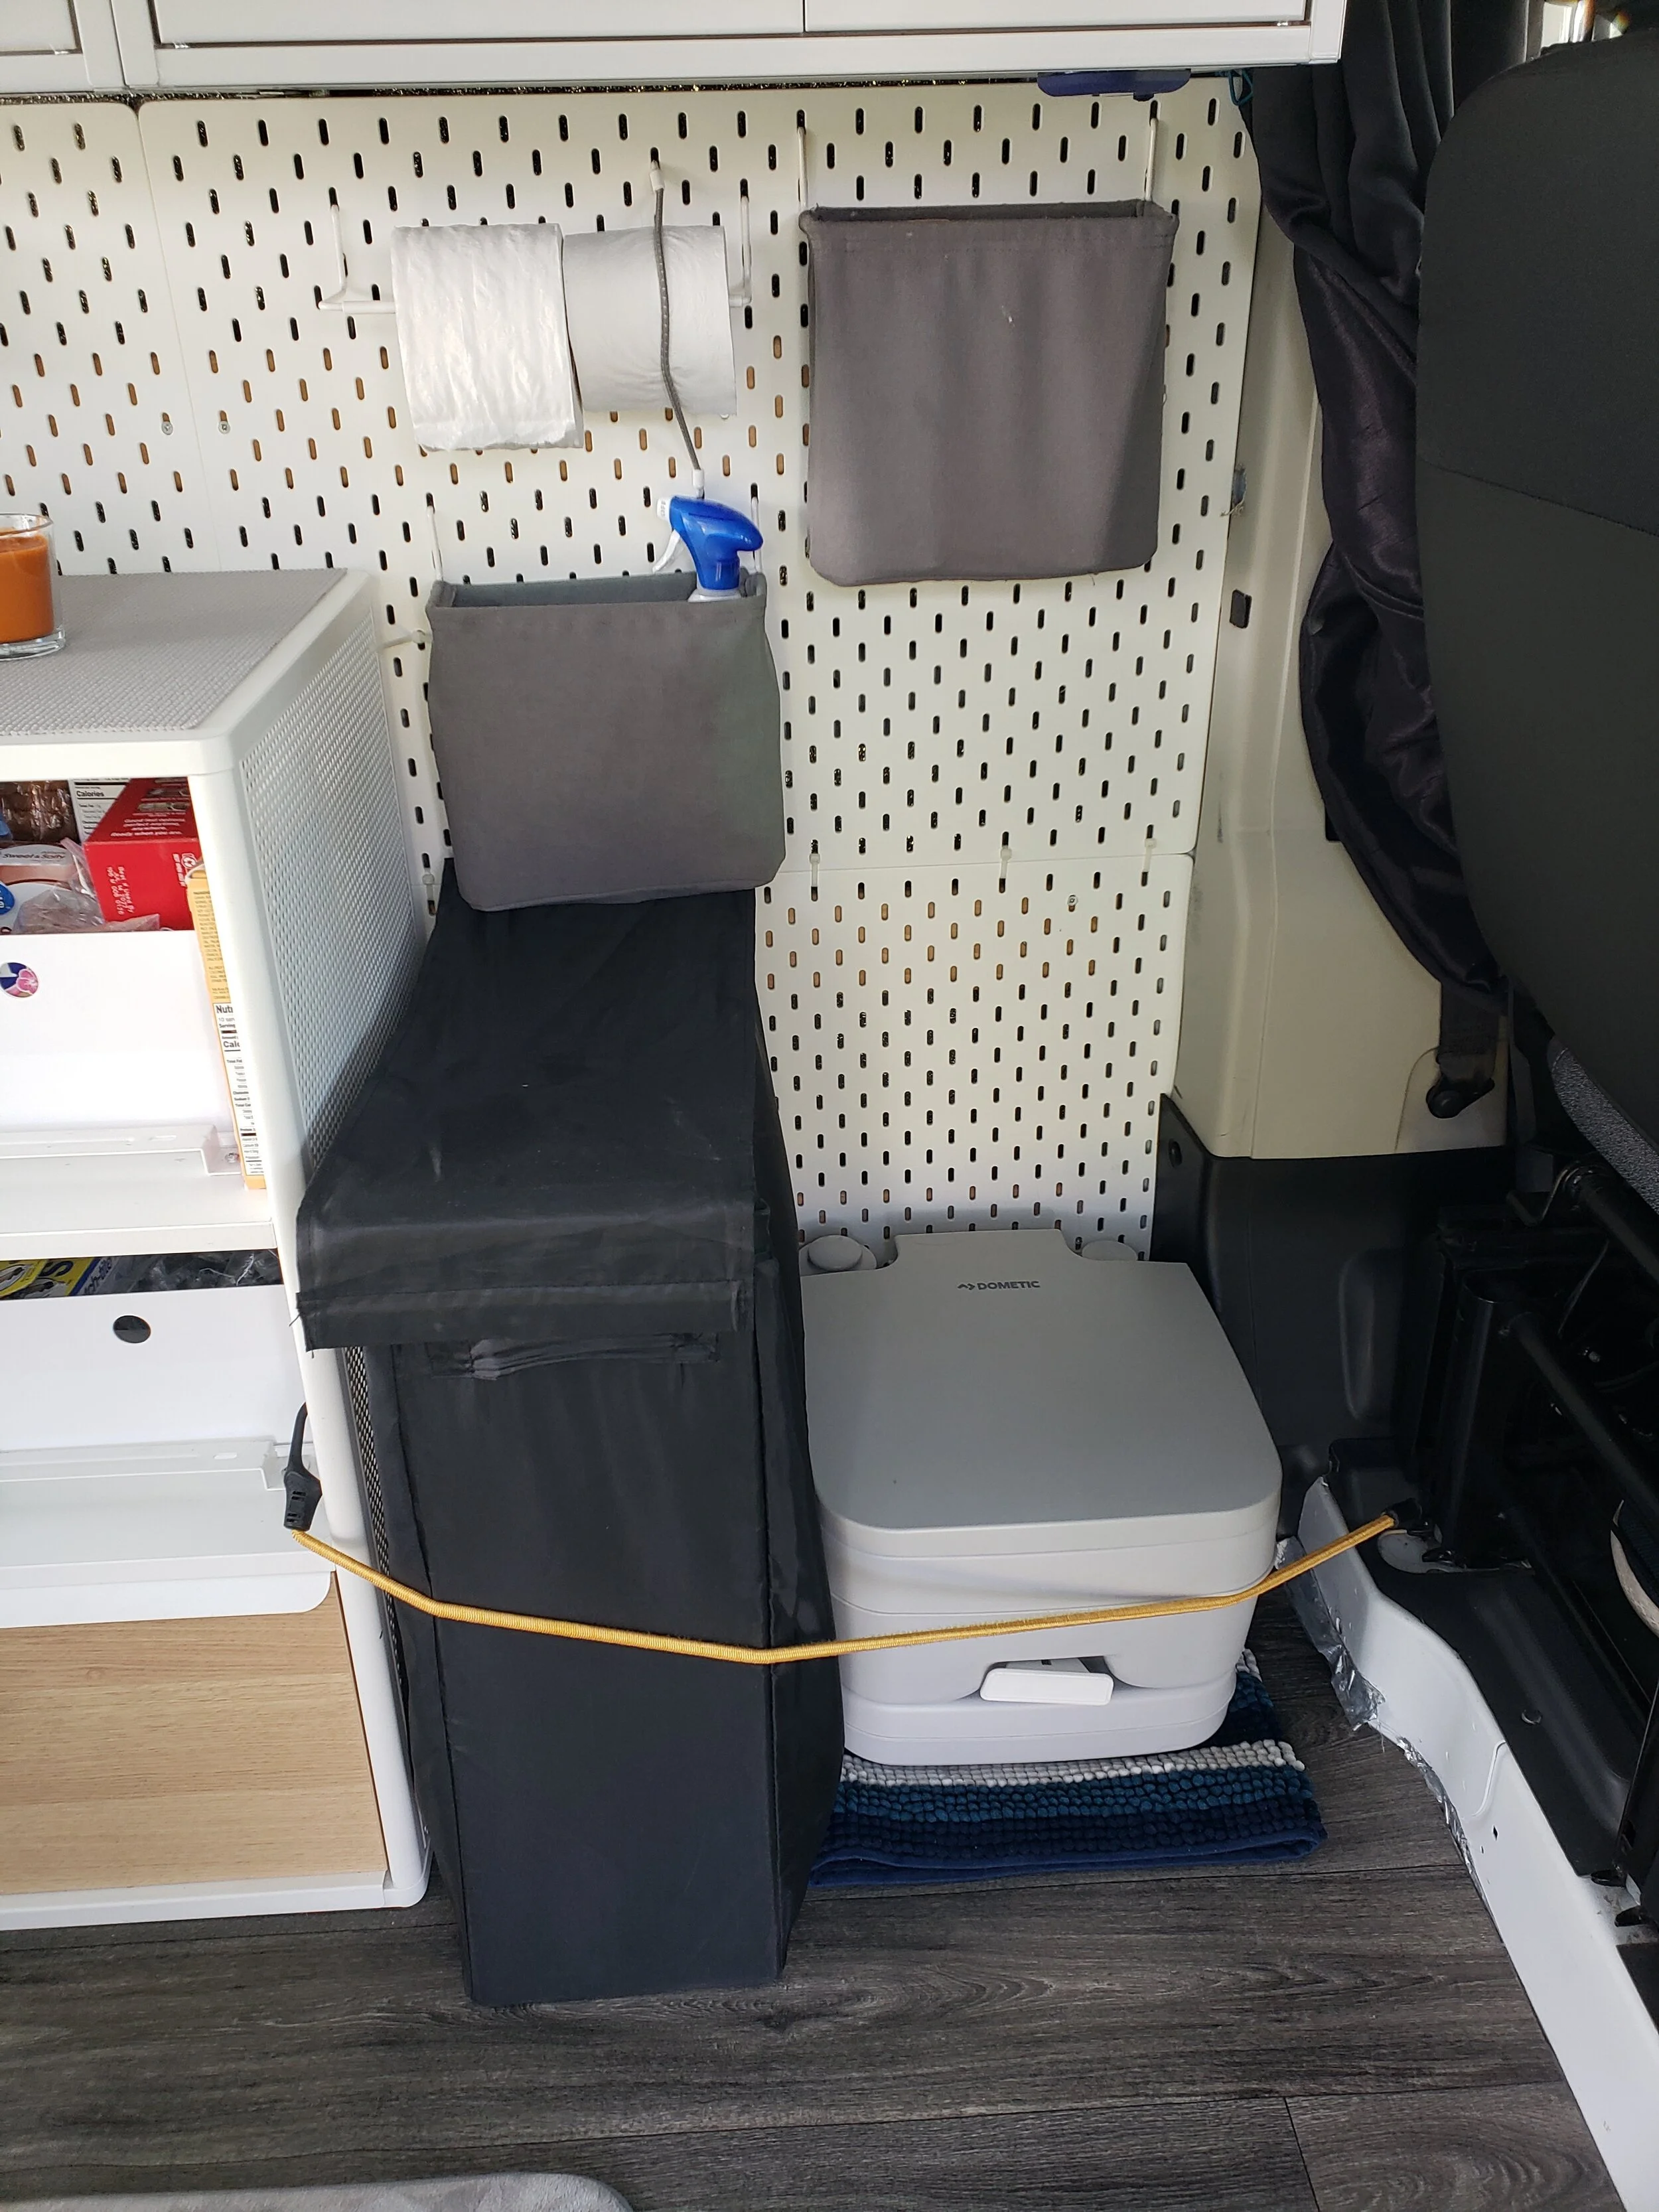
For the toilet, we bought the Dometic 2.5-gallon Portable Toilet for $97. We chose the smaller 2.5-gallon toilet instead of 5 gallons thinking that we will likely wait until the tank is almost full before dumping and cleaning it. A smaller tank means dumping and cleaning every 5 days and the smaller size makes it easier for us to clean. It’s been 3 months since we purchased the portable toilet and the 2.5 gallons is just the right size for the 2 of us. We also use a combination of porta-pak tablets and bleach to mute out the stinge in the tank. Surprisingly, we haven’t had any issues with odors in the van. Both the porta-pak and bleach masks it well.

Where do we dump our black water?
Cleaning the black water tank is probably the hardest part about van-living though, surprisingly, it doesn’t gross me out completely. First, you have to know that the porta-pak breaks down the black tank content into a liquid which makes it easier to dump and clean. RV toilet papers also dissolve however the regular ones don’t. So far, we’ve only used regular toilet paper but since we only dump on non-flushing toilets, the use of regular toilet paper isn’t an issue. I’ve read other blogs about clogging the toilet when dumping a black tank with regular toilet papers so I’m very cautious about it.
As for dumping locations, you’d be surprised how many options there available and many of them are free.
Some campgrounds and parks have free dumping stations.
Some Conoco gas stations have free dumping stations.
Any public portable toilet.
Paid dump station on RV parks usually charging $5.
We prefer to find a free campground dump station or a public portable toilet. As mentioned earlier, I avoid dumping on a flushing toilet to avoid clogging it.
How do we clean our black water tank?
First, we add some bleach to our flushing water. Every time we flush, our toilet bowl is rinsed with bleach water. Then, we add the porta-pak tablet and a splash of bleach into the water in our black tank. Somehow, the bleach makes the walls of the tank glossier and prevents the black water from sticking. After dumping, we simply rinse the tank with freshwater multiple times. I also add bleach on the last rinse.
Some tips…
Make sure to tighten the lid on your black tank! We use a silicone jar grip to help us easily tighten and loosen the lid.
Use a porta-pak and bleach combo. We didn’t add bleach the first time we used our portable toilet but later found that it was easier to clean the tank with bleach in it.
When using bleach, it builds up gas inside the tank so make sure to release it by opening the valve in the middle every few days unless you’re using the tank daily.
If you don’t have a Maxx Air fan like us, a portable fan is a great alternative to create air circulation in the van.
To keep the van smelling fresh not just while using the portable toilet but also while cooking, candles and scented sachets are your best friends!
The Shower…
We use the Nemo Helio Pressure Shower either inside our van or outdoors. We first started using this pressure shower as a faucet for washing dishes but later upgraded to a chargeable bottle-top water dispenser. This pressure shower has a 3-gallon tank and comes with a foot pump, nozzle and 7-foot hose. I love the simplicity of this design and have worked well for us for almost 2 years now.


Showering outdoor after chasing waterfalls with Helio Nemo outdoor shower!
We have 3 shower setups:
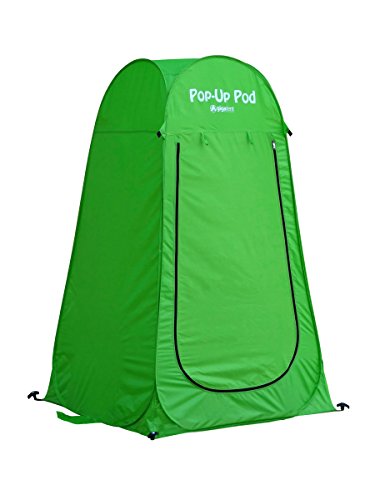
Outdoor using a shower tent - this is our preferred shower setup because it gives us maximum room and privacy. Just like a regular tent, we use stakes to keep the shower tent in place. Inside the tent are the Nemo Helio pressure shower and a shoe tray. We step on the shoe tray while showering, it prevents the dirt and dust from sticking to our feet and legs.
Outdoor using a shower curtain between our back doors - we open both back doors and use hooks to hold the shower curtain between both doors. Before getting the outdoor tent shower, we used this setup while in campgrounds. Showers are mostly done wearing bathing suits.
Inside the van using a basin and shower curtain - we bought a round metal basin around 3-feet wide and using hooks to set the shower curtain in place around the basin. We only shower inside the van when in city streets where our shower tent cannot be used or when the weather is too cold for an outdoor shower.


Showering with hot water….
Yes, we shower with hot water when the weather is cold! On hiking and active days though, we prefer cold showers. To take warm showers, we simply boil water and add it to the water already in the tank.

Pot with boiling water for a warm shower.
My husband is thinking about changing some things in our build which might include a built-in shower. That would be great! Though we are able to figure out how to shower vanlife-style during the pandemic, it would be a lie to say that I don’t miss taking a continuous hot running shower. We are fortunate enough to have many family and friends who are always willing to share their bathrooms with us when we visit.
Check out our first build that only cost $1000 here and our second build that cost $2000, both using mostly Ikea furnishings.